Feature Guidelines 23.102.0 - On Premise

Guidelines
Version 23.102
Date: 07.09.2023
Linked Jira Issues in Reports: Know more!
Useful when:
You are using aqua and Jira and want to create a comprehensive report for your stakeholders to provide update on the project's status
You need to see Jira issues in the reports after test runs are done for the audit purposes
Guide:
Navigate to the ‘Reports’ page and either select the report you want to modify or create a new one.
Then, at the ‘Edit properties’ step, select when you want the Jira issue to be loaded

Go back to the layout step, navigate to the following group, and add the label to your layout.

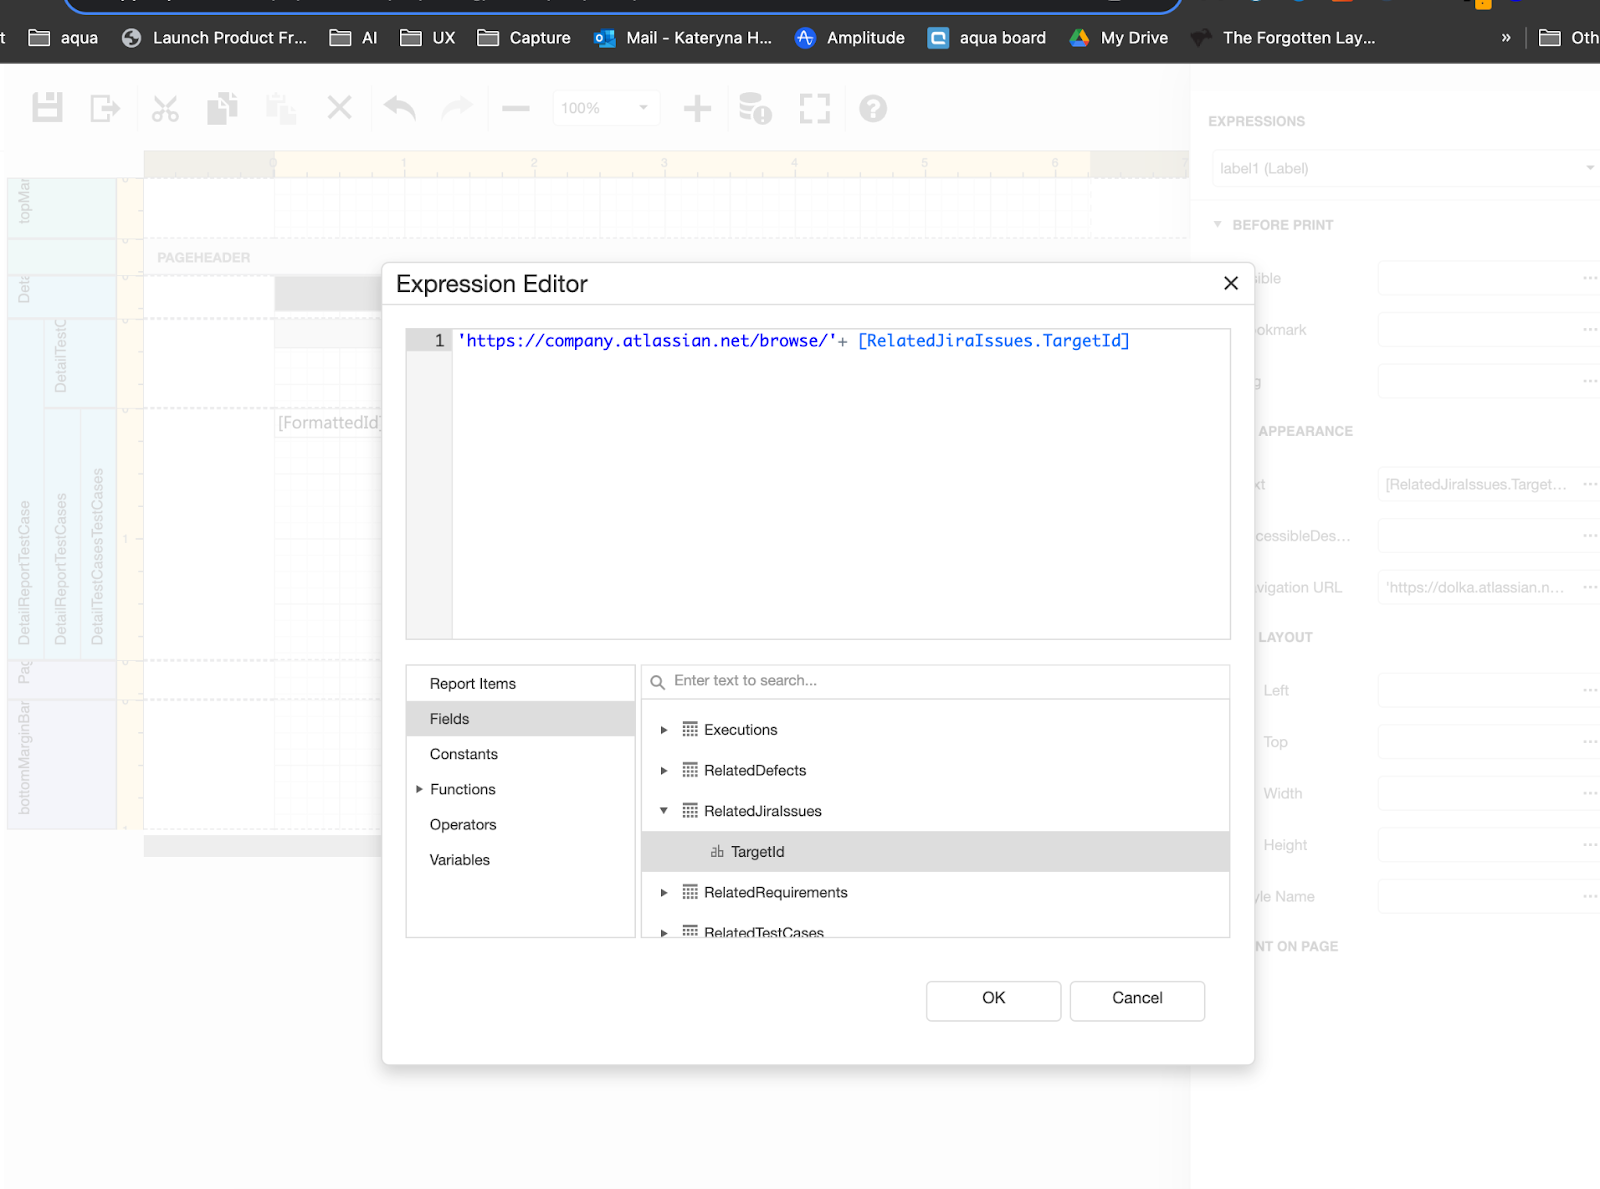
You can also reference a link to the Jira issue. To do so, click on the added label and once the expression sidebar opens, click on the 3-dot menu next to the ‘Navigation URL’ field.

Add your base Jira URL to the issues with apostrophes before and after the URL. Then, add plus and navigate to the ‘Fields’ section, expand ‘RelatedJiraIssues’ and doubleclick on ‘TargetId’, and save the report.
Once you generate the report, there will be a link to the Jira issue that is linked with your aqua test case or any other item you referenced in the report.
If you want to include multiple Jira issues, click on the ‘DetailReport [itemtype] section when creating the report.

On the ‘Properties’ sidebar under the ‘Actions’ group, click on the ‘Report Band’.
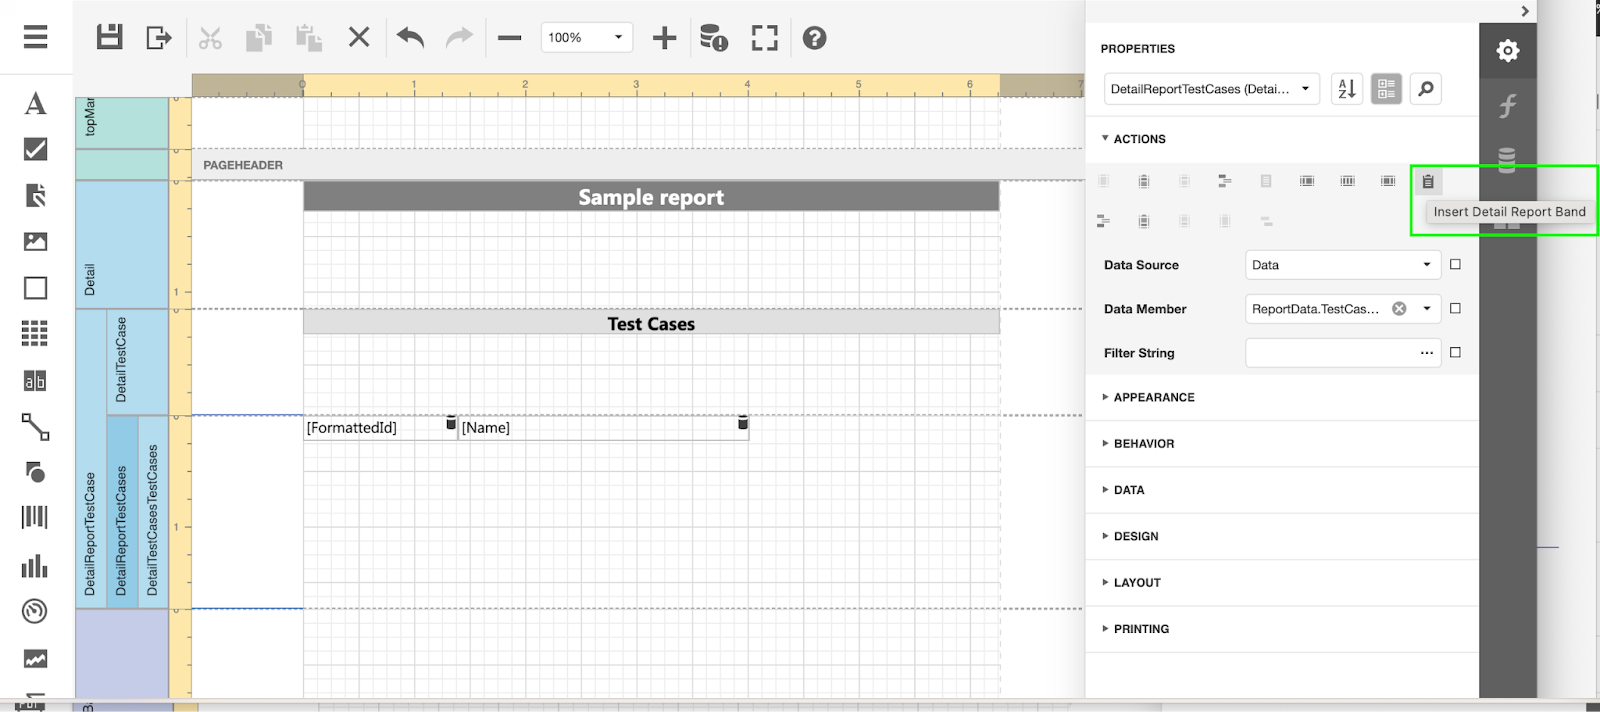
Once you do that, the new block will be added to the layout.

For ‘Data Source’, select the ‘Data’ property; for ‘Data Member’, select the ‘Related Jira issues‘ property.
Now, select ‘DetailReport1’ and drag and drop e.g. table to the page.
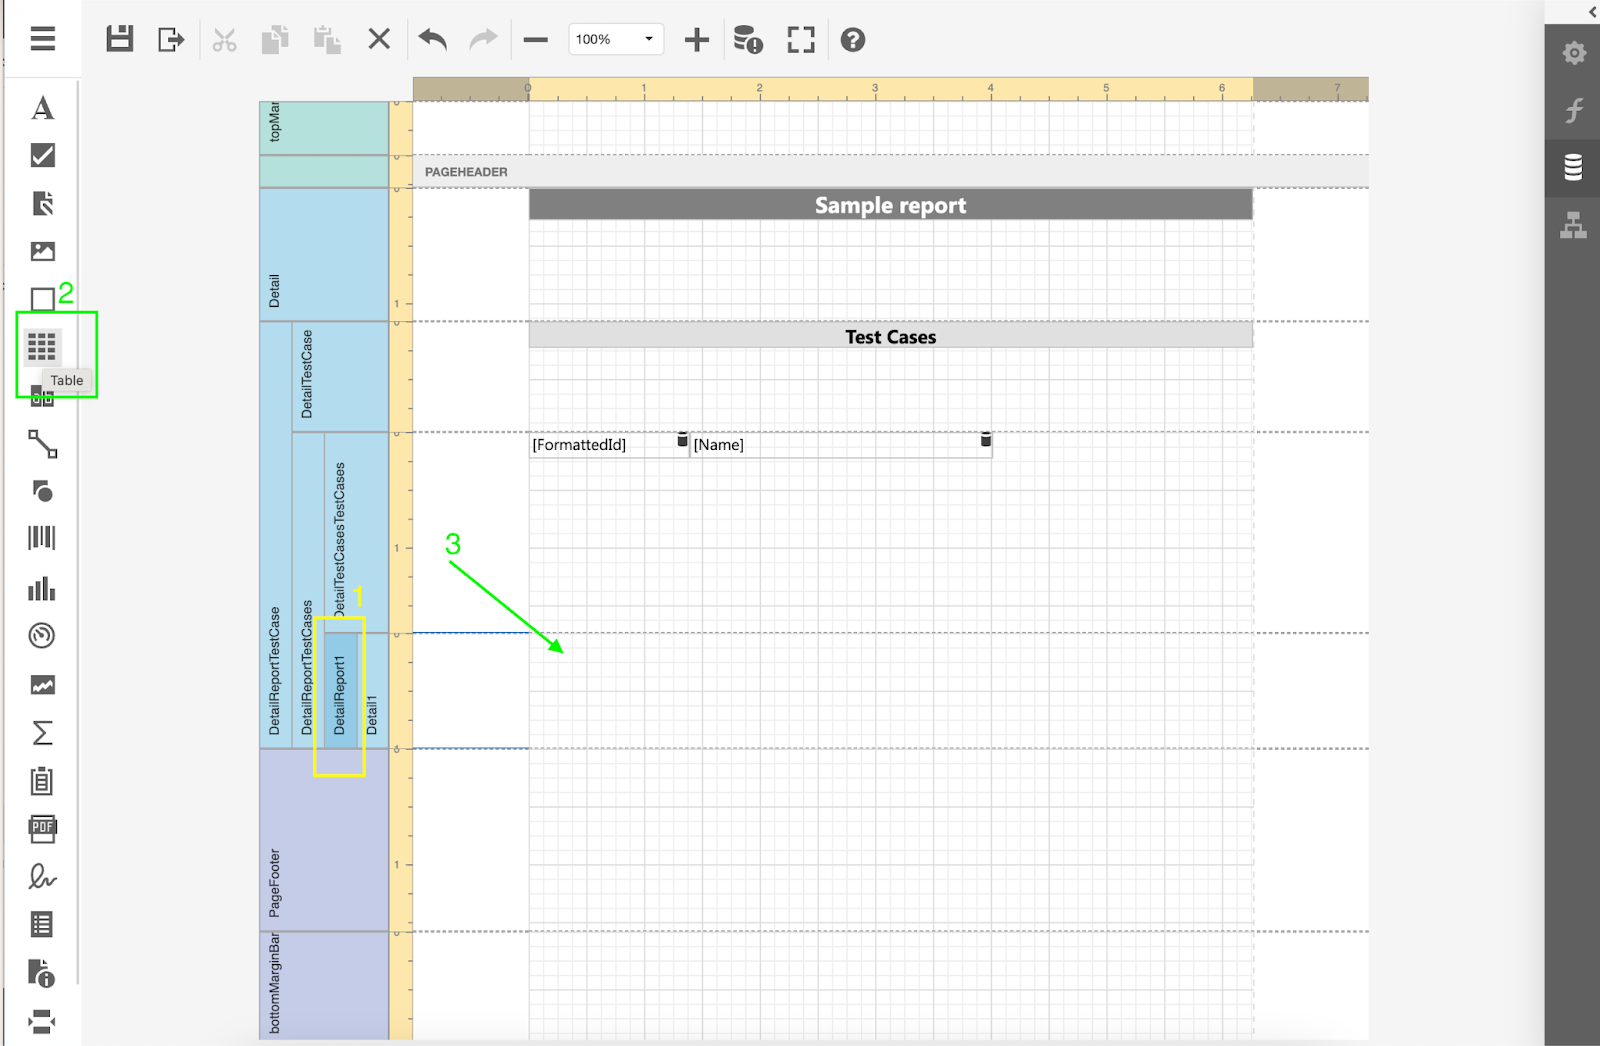
Leave as many cells as you need, then go the Field list’, select 'Report Data' -> 'TestCaseReport' -> 'TestCases' -> 'RelatedJiraIssues' and then drag and drop to the cell ‘TargetId’

Save your report and once you generate it, all linked Jira issues will be included into your report.
New Integrations Page Look and Feel – Your Integration Superpower!
Useful when:
You want to have an overview which project has an integration
You want to see if there is a connection to Jira to make sure that integration is successful
You are looking forward to new integrations and want to provide some feedback
Guide:
Open the 'Integrations' page, and you'll land on the 'Global' tab. Here, you can set up a single integration that applies to all the projects you have in aqua.


Choose the integration, such as Jira, and then click the 'Configure' button.

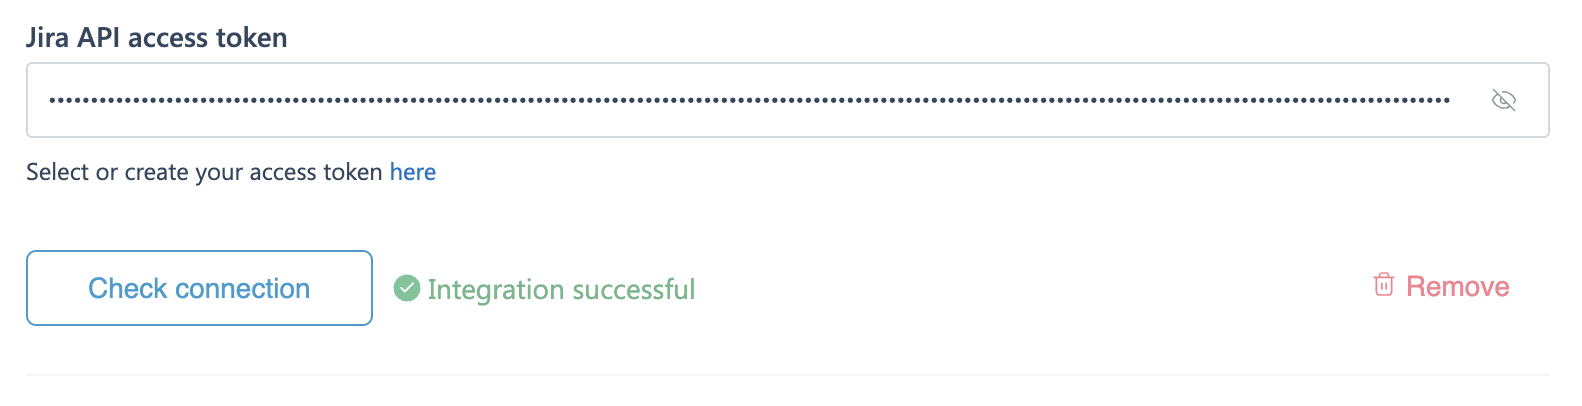
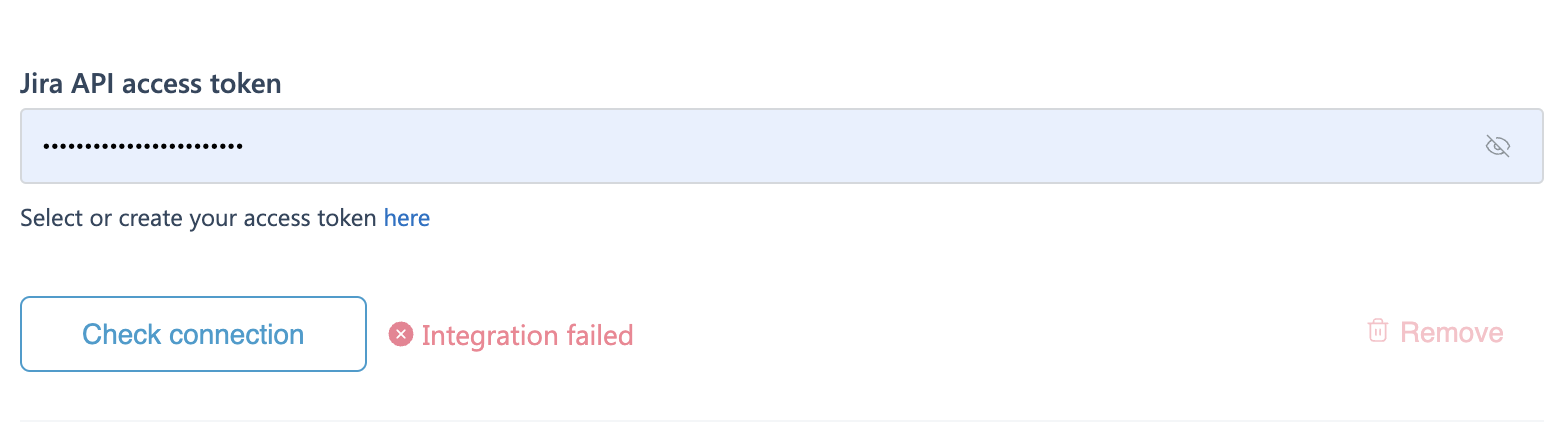
Enter all the necessary details and click 'Check connection.' If all your credentials are correct, you'll see the following message:
If your credentials are incorrect, you'll encounter the following message:
To finish the integration set up, don’t forget to click the ‘Save’ button.
You can also set up the integration on a project level, either from the main Integrations page or within the project settings.
Once you've created an integration on a project level, you'll find a tile under the project tab that displays the added integration and which project it's associated with.


It's important to note that project-level configuration takes precedence over the global configuration.
Additionally, moving forward, if your project is put on hold or you need to make adjustments, there's no need to remove the integration entirely. You can simply disable it and re-enable it as needed.

This means that users won't have the ability to preview or link issues or tickets to aqua projects while it’s disabled, but everything becomes available again as soon as the integration is re-enabled.
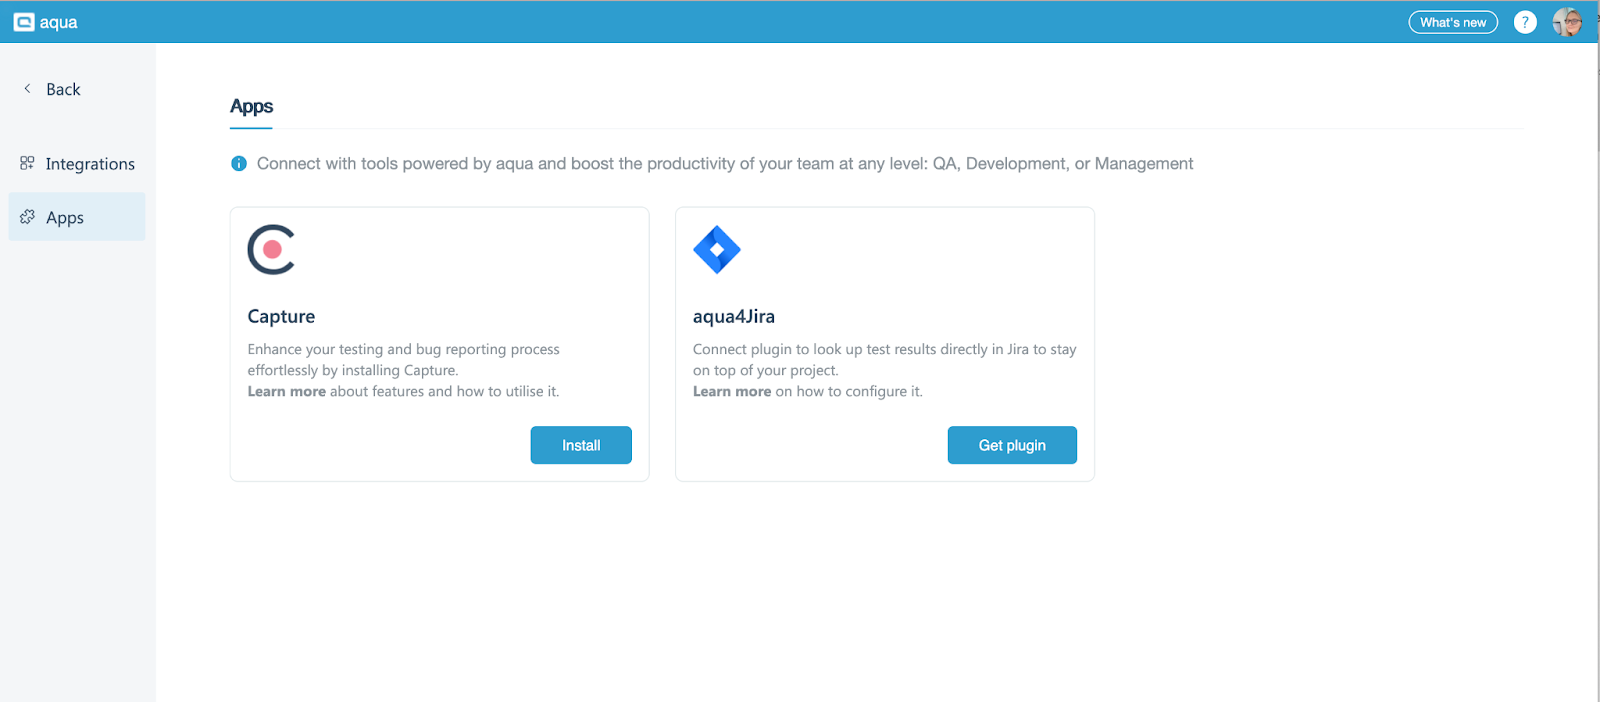
We also added the page with aqua apps that you can download and utilise for free. Learn more here about Capture and here about the Jira plugin if you haven’t used it yet.
Got a wish-list of integrations you'd love to see? We're all ears! Access the survey from the ‘Integrations’ page and tell us what you're dreaming of.

Test Execution: Your Choice, Your Pace
Useful when:
You want to resume an incomplete test and pick up right where you left off, ensuring that the effort already invested in the test is not wasted
You want to ensure that there are no unfinished text executions and user don’t populate unnecessary runs
Guide:
From now on, aqua will automatically prompt you once there is a previous unfinished test execution.
Just press the ‘New Run’ button and you’ll see the pop up. Select ‘Continue’ if you want to resume the previous run. In case you want to start a new one, just click ‘New run’

Please note: aqua will show you this pop up only if the last test execution is not completed. It won’t be shown in case you have old recorded uncompleted test executions.
Dashboard Bliss: Fresh Look, Effortless Management
Benefits:
The enhanced dashboard design: you now have the power to create new charts from multiple locations with ease.
Everything you need is thoughtfully organized in header, sidebar and dropdowns, ensuring that locating and utilizing it is effortless.
Guide:
Create the dashboard from multiple locations by clicking the corresponding option
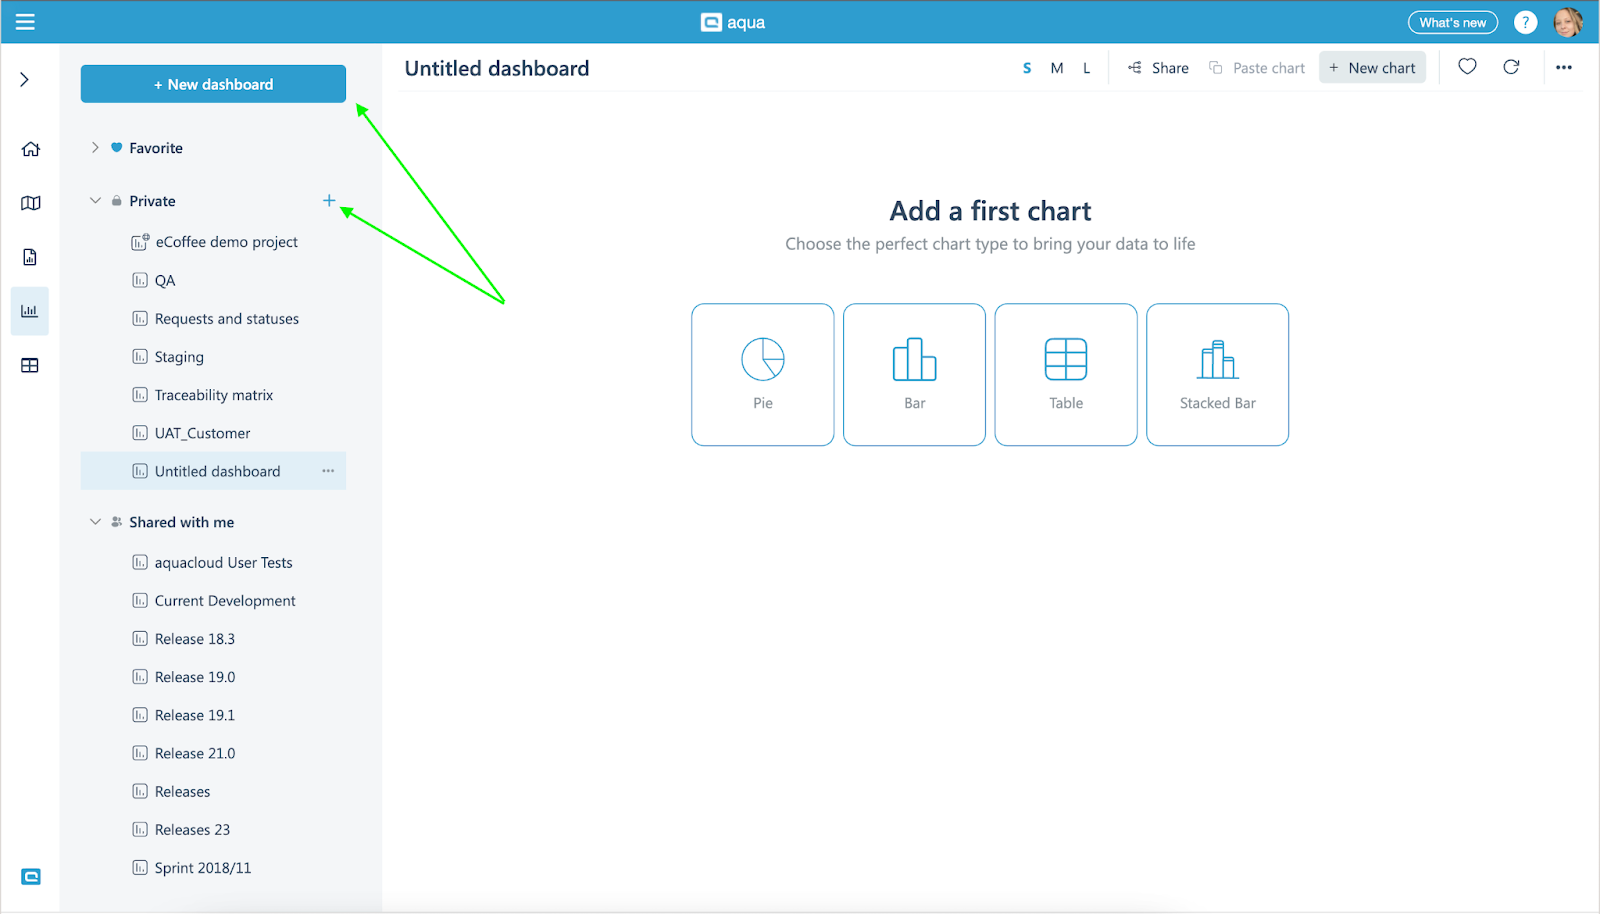
Select the type of the chart you want to create and connect the data to display afterwards.
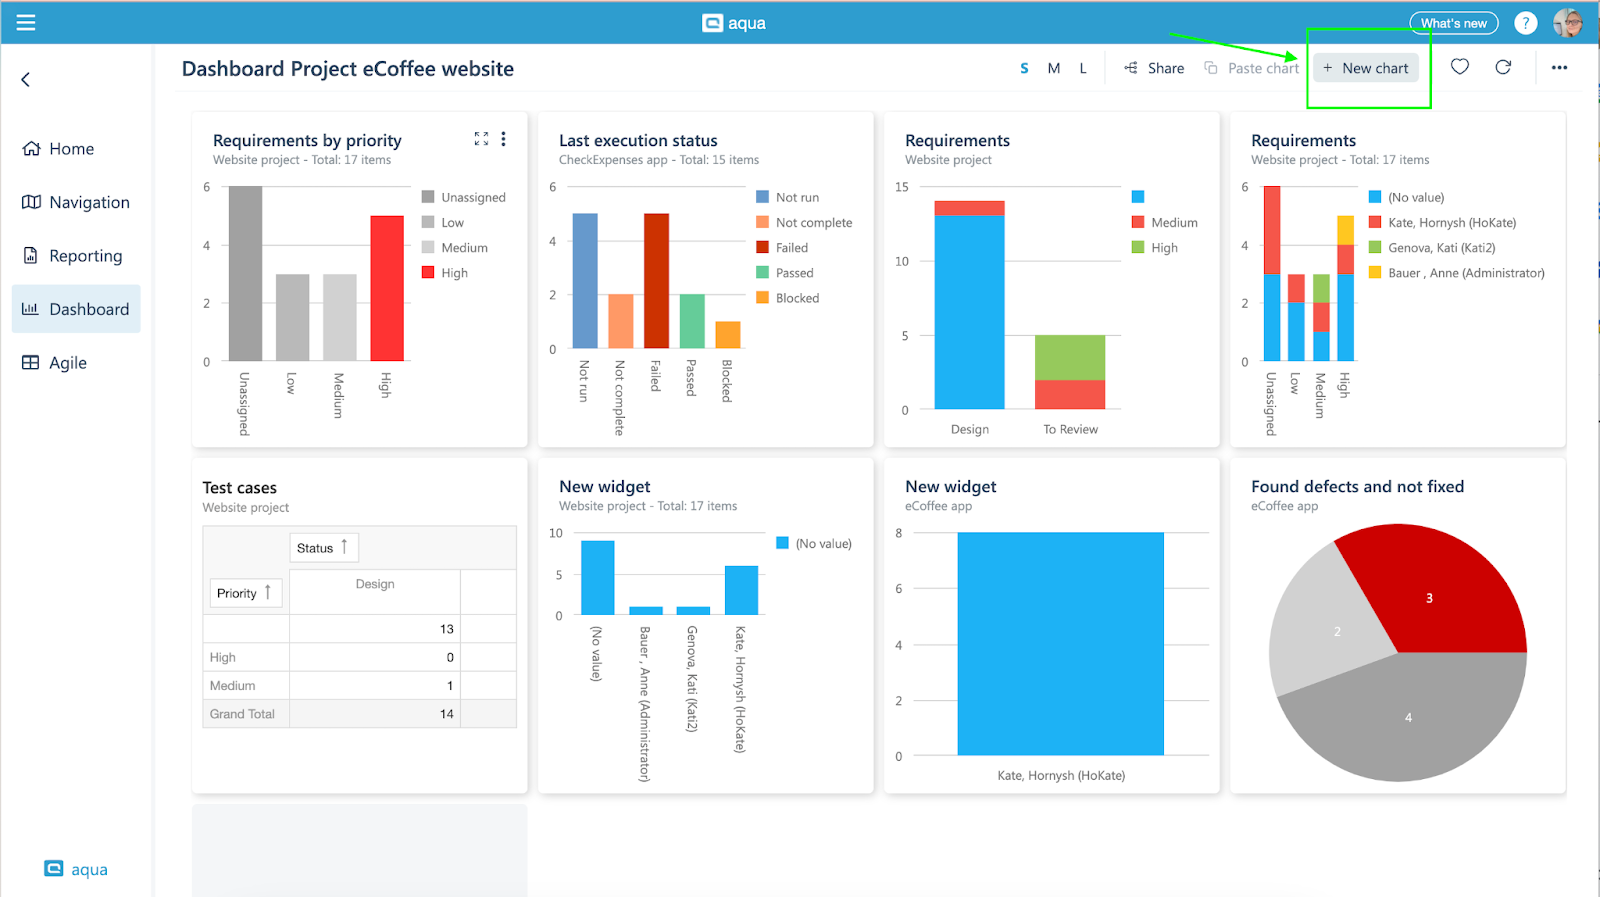
All main options are logically grouped at the header and easily accessible for you whenever you need to update the title, change the size of the chart, share it or copy and add to another dashboard.

New Look and Feel for Chart Creation: A Dash of Wow!
Benefits:
Streamlined Chart Creation: Easier to select and change the chart types
Customization Power: With the revamped chart creation, you gain more control over the appearance and behavior of your charts.
Guide:
Open the dashboard and click on the 'New Chart' button.
Once the modal window appears, choose the type of chart you'd like to use.
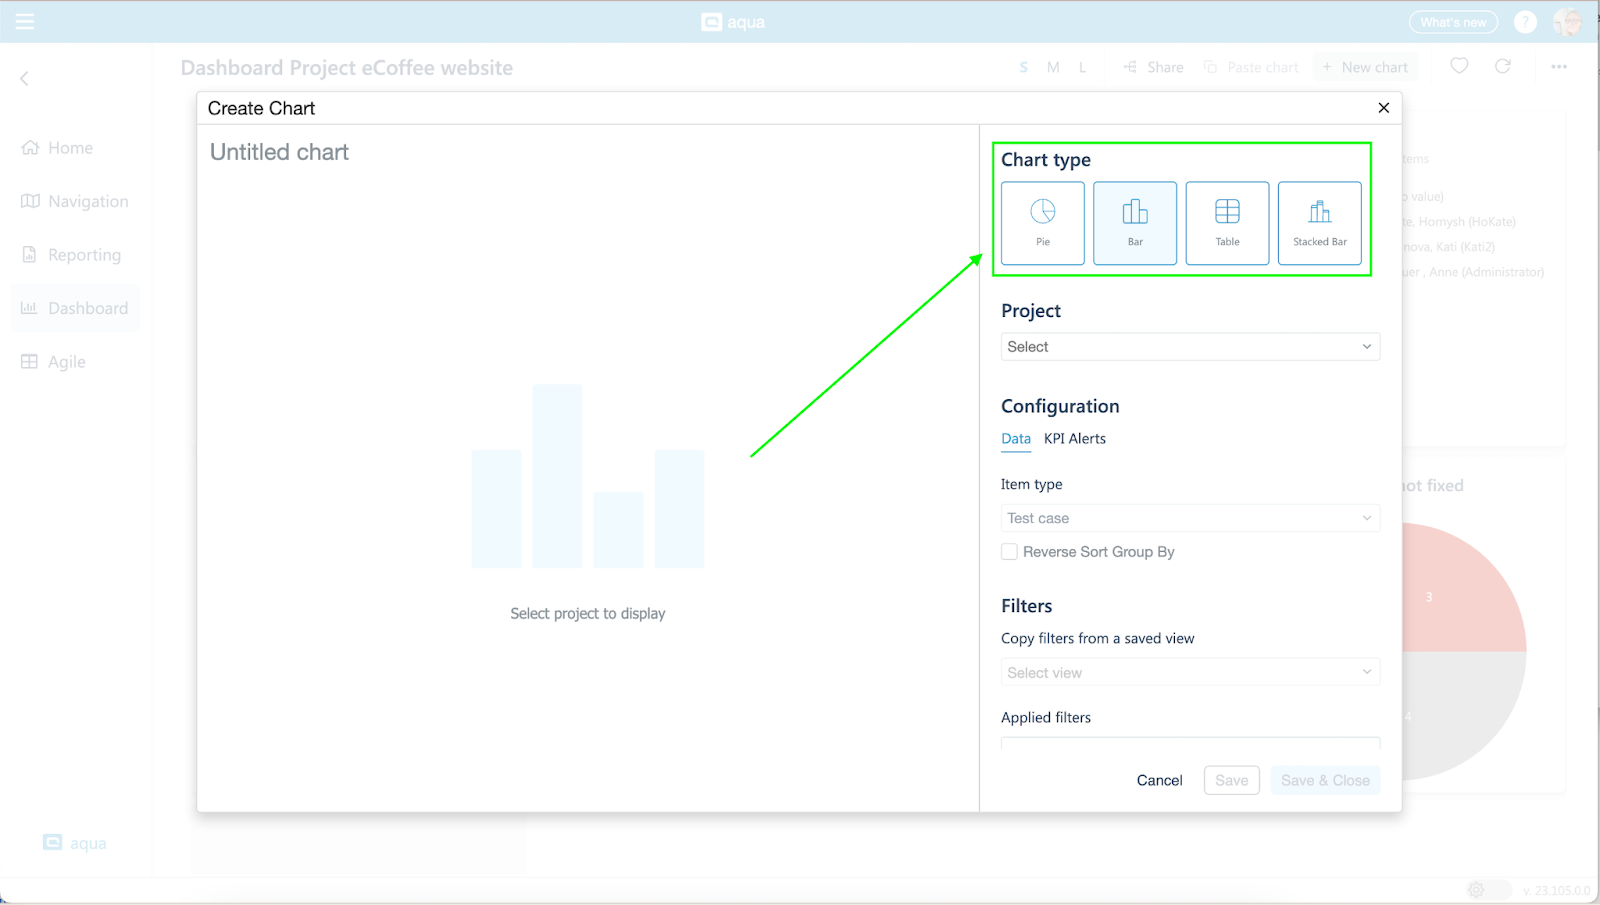
Next, select the project or specific folder containing the data you want to use for your chart and the item type.

Make any necessary adjustments by applying filters and selecting additional details you want to display. Finally, click the 'Save' button to preview your chart.

If you're satisfied with how the data is presented, simply click 'Save & Close.'
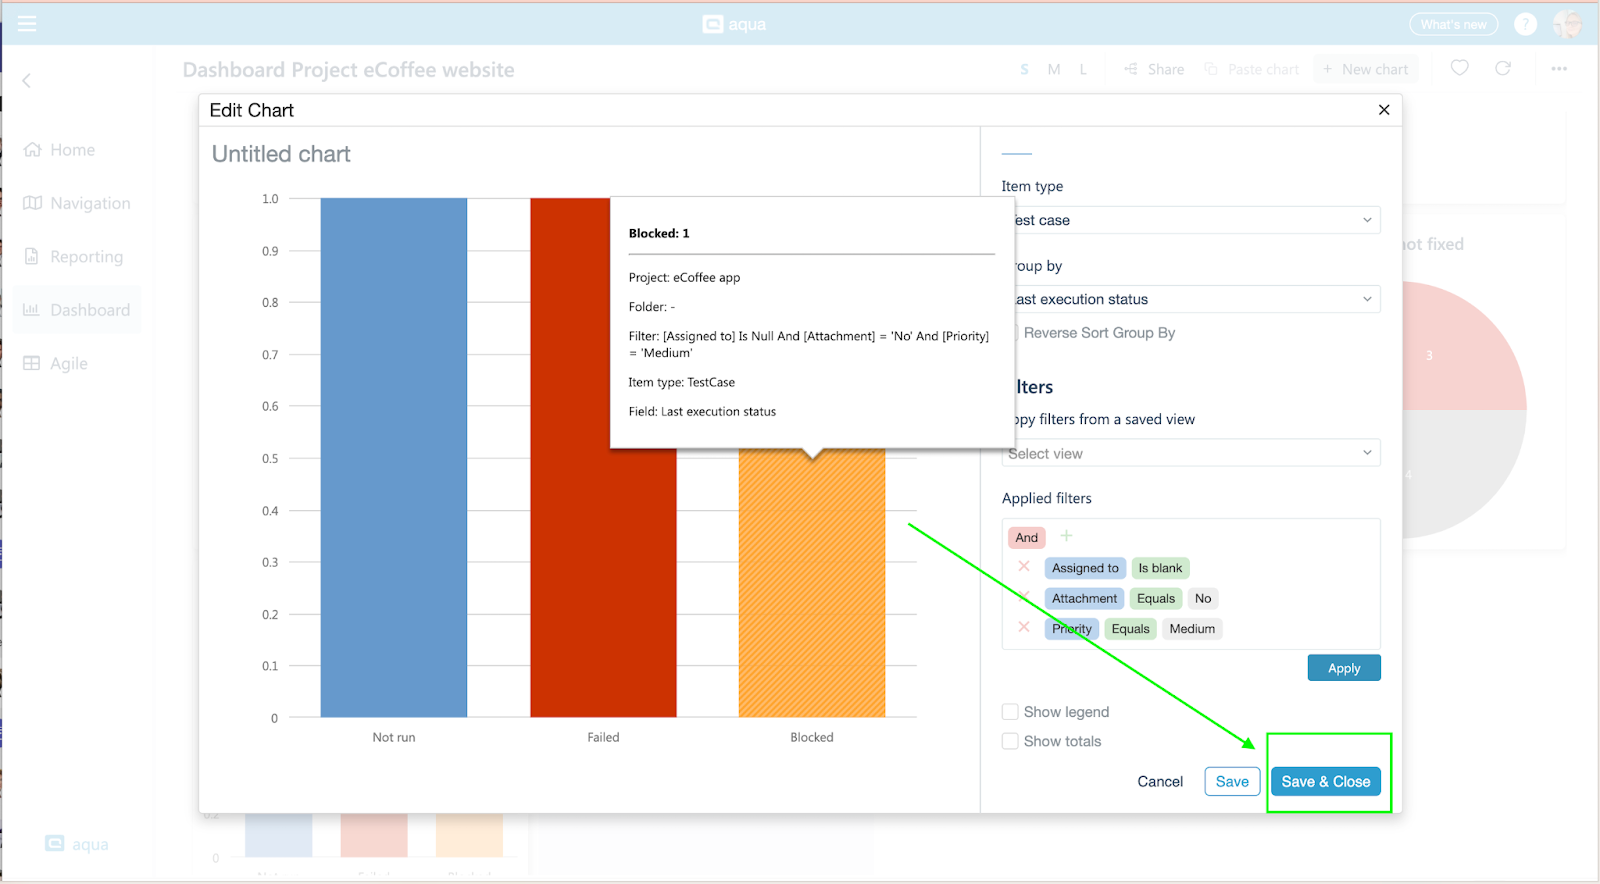
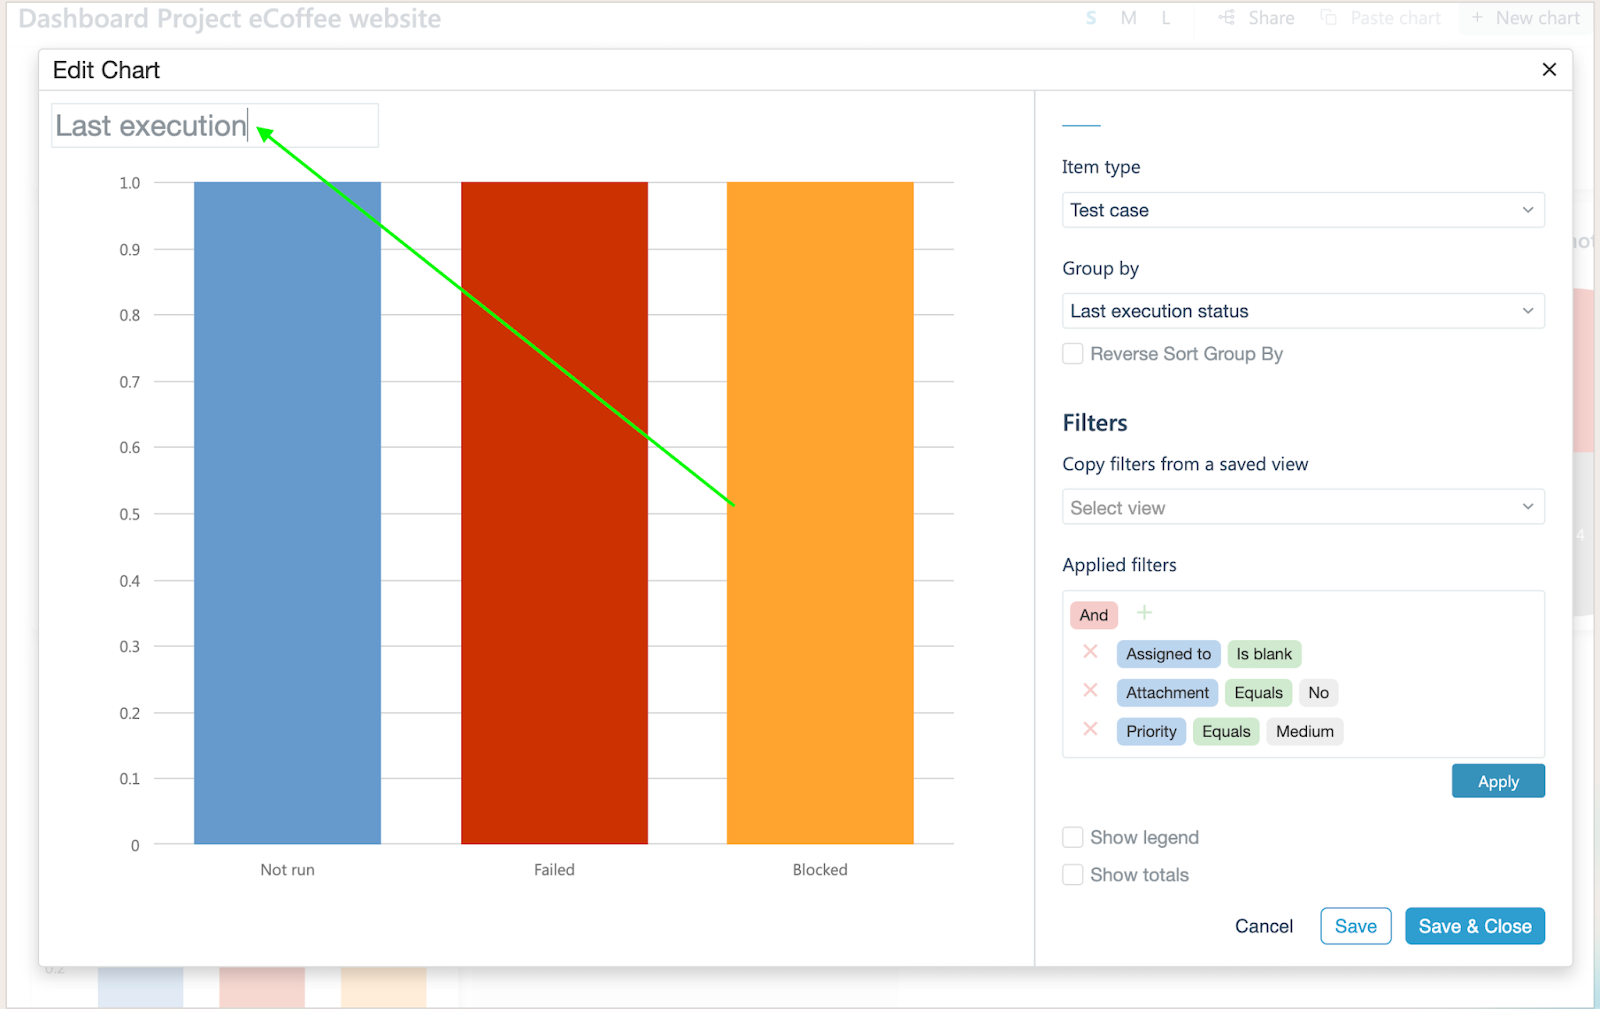
If you wish to make adjustments or change the chart type, no worries; make the necessary changes and click the 'Save' button again.
Don't forget to provide a title for your chart so you can easily understand the data it presents.
Small UX Tweak: Project and Item Creation Made a Breeze
Benefits:
More intuitive and user-friendly approach that reduces the learning curve for new users and minimizes the steps required to manage projects and their associated items.
Option to create it from a tree view enhances the overall user experience and reduces the potential for errors.
Guide:
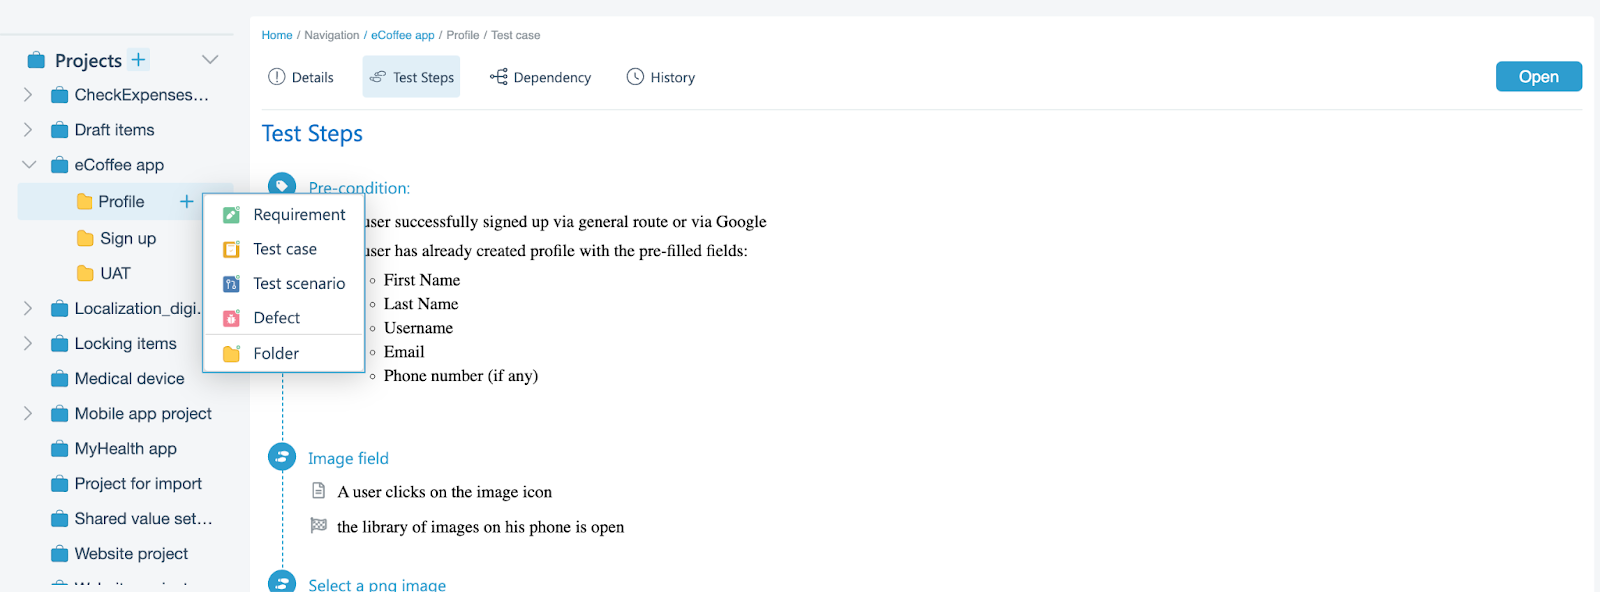
Creating a project becomes even easier. Just click the 'Plus' icon next to the 'Project' label.


To create an item or folder within a specific project, first select the project, and the plus icon will appear. Click on it, and choose the option you need.
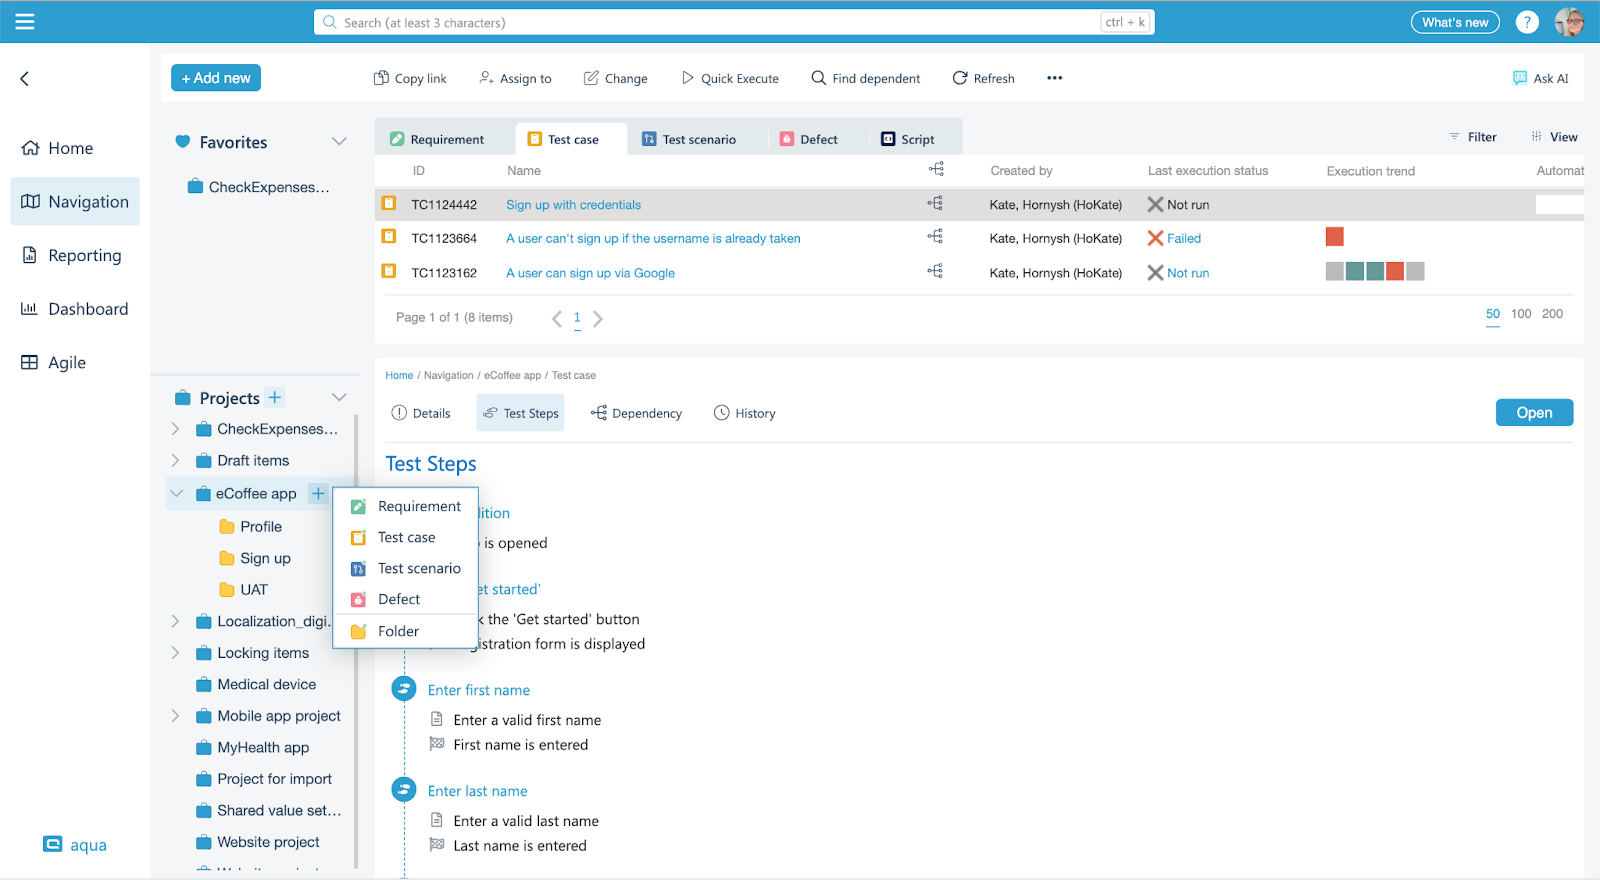
If you want to create an item within a folder or subfolder, select the folder and click on the 'Plus' icon that appears. Then, perform the same actions as described above.
Single Tab Ticket Management: Tab-tastic Efficiency
Useful when:
You are annoyed by juggling multiple tabs to access different items and want to open the item in the same tab
You want a clutter-free window and ease navigation between the tabs
You need to easily navigate to the main page whenever it’s needed and save time on opening the new tab with aqua navigation page
Guide:
Whenever you need to open the item, just do it the same way as you did before: either click on the item title or the ‘Open’ button.
The ticket will open in the same tab without populating separate tabs.
In case you need to go back, just click the ‘Back to main’ button and you’ll get back to the ‘Navigation’ page.

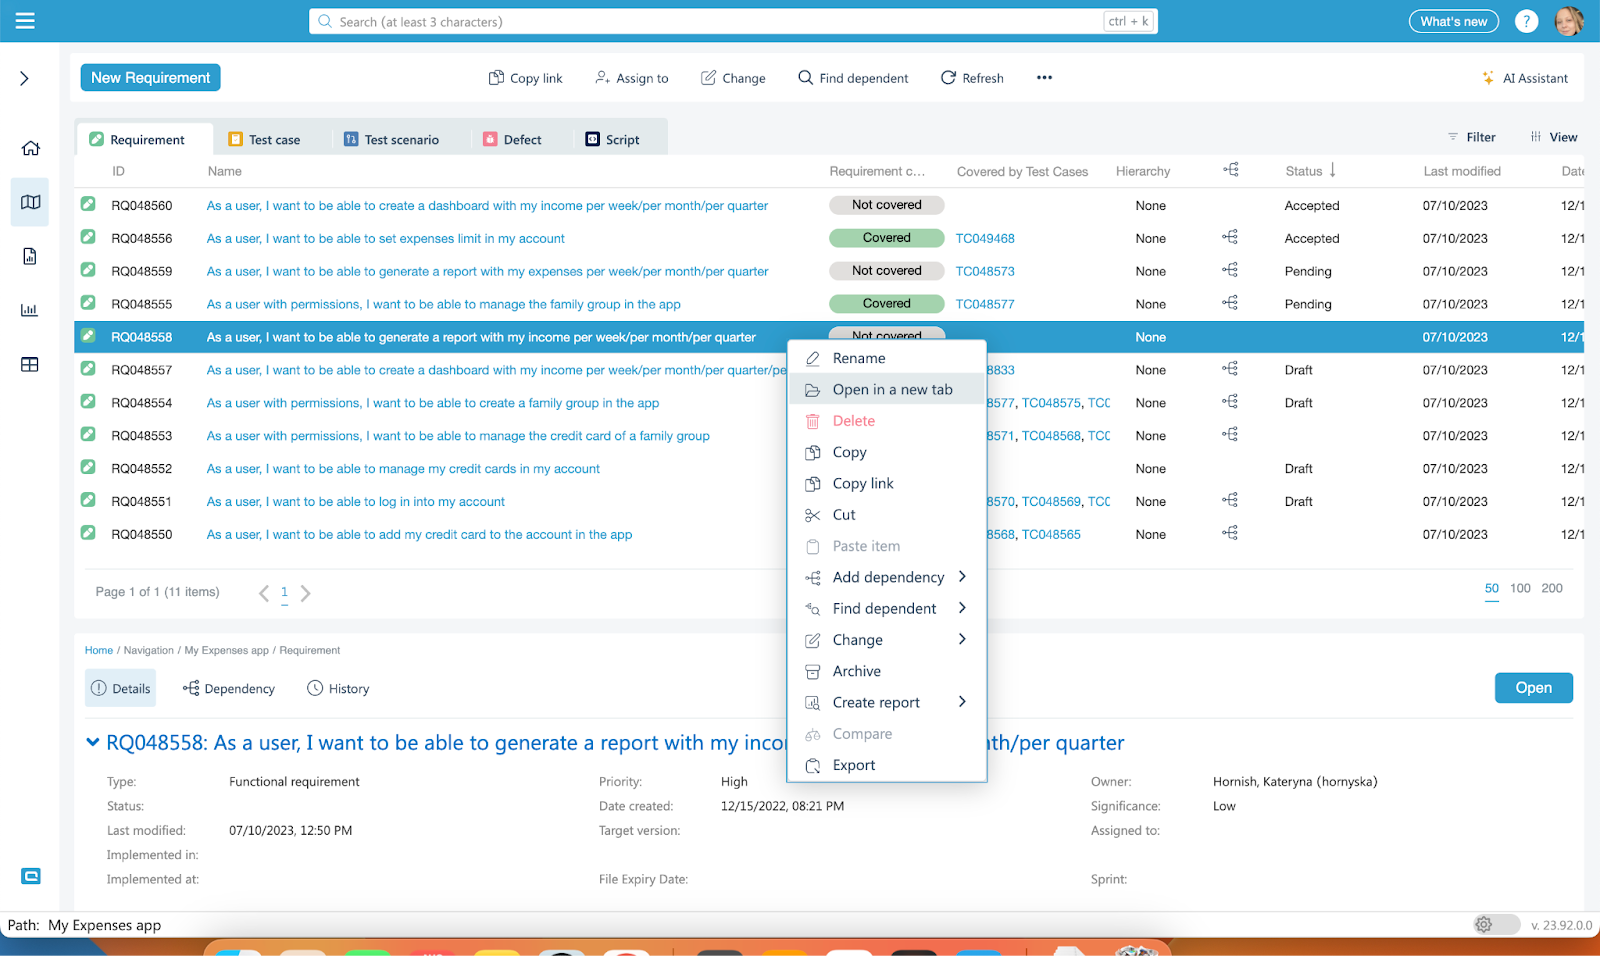
When you need to open multiple items, just click on the item and click on the ‘Open in a new tab’ option in the context menu.
Drag and Drop Columns: Effortless Navigation Tweaks
Useful when:
You want to easily add the column to the exact place to the item grid
Guide:
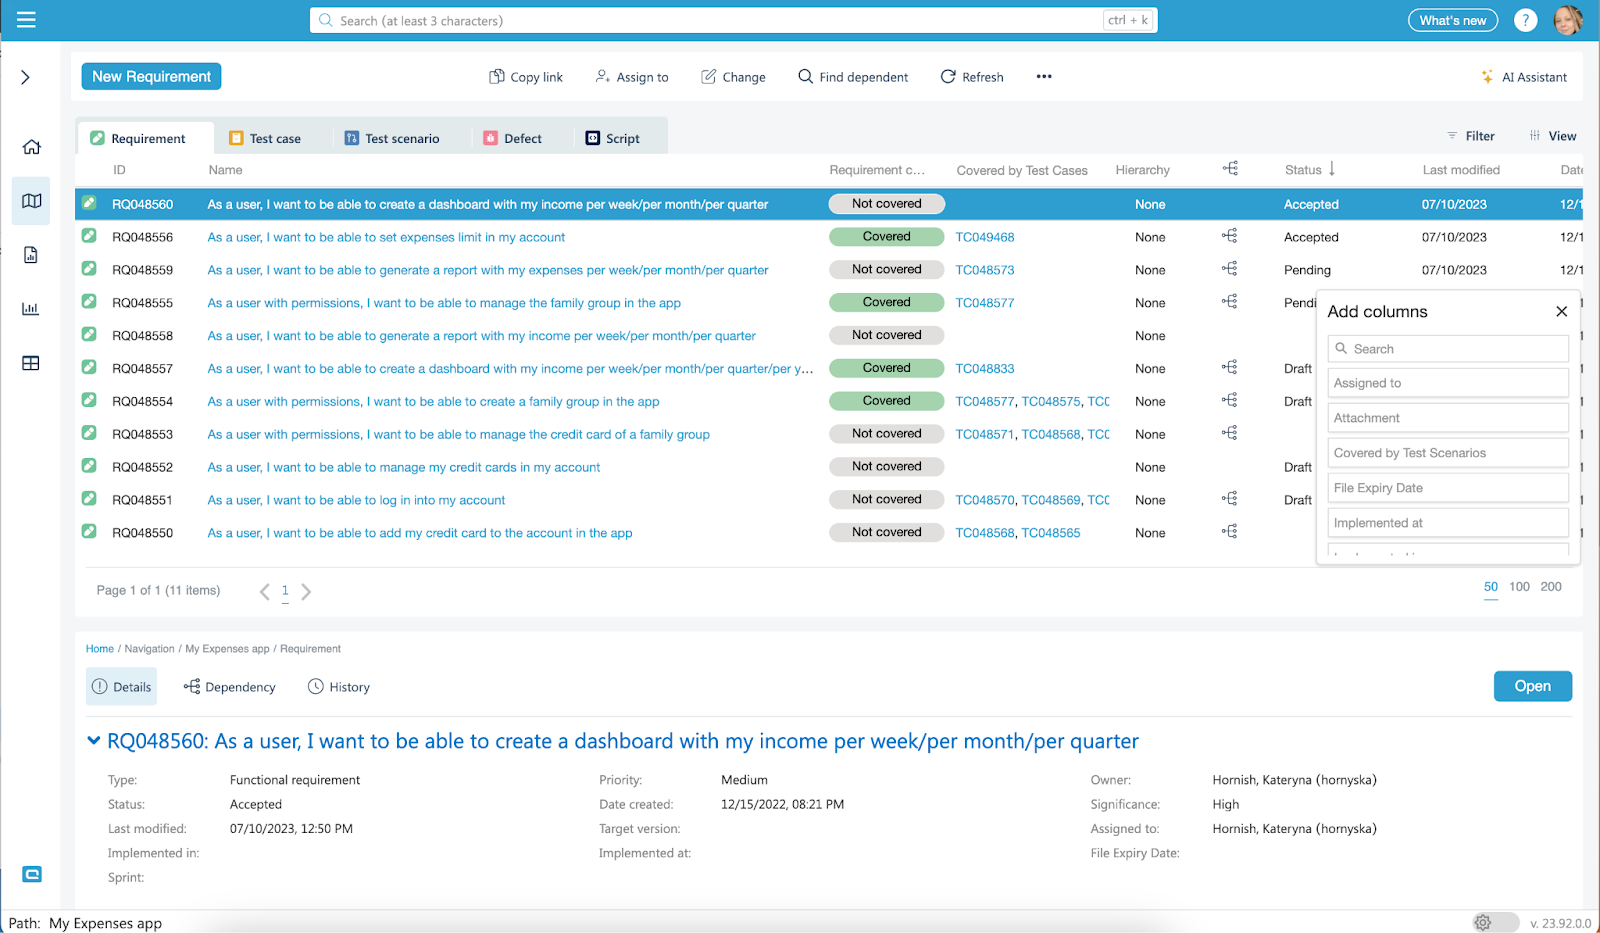
Whenever you need to drag and drop a new column to the grid, you can use the Alt+Shift+C shortcut .The column chooser will appear and you can drag and drop items to the exact place on the grid.
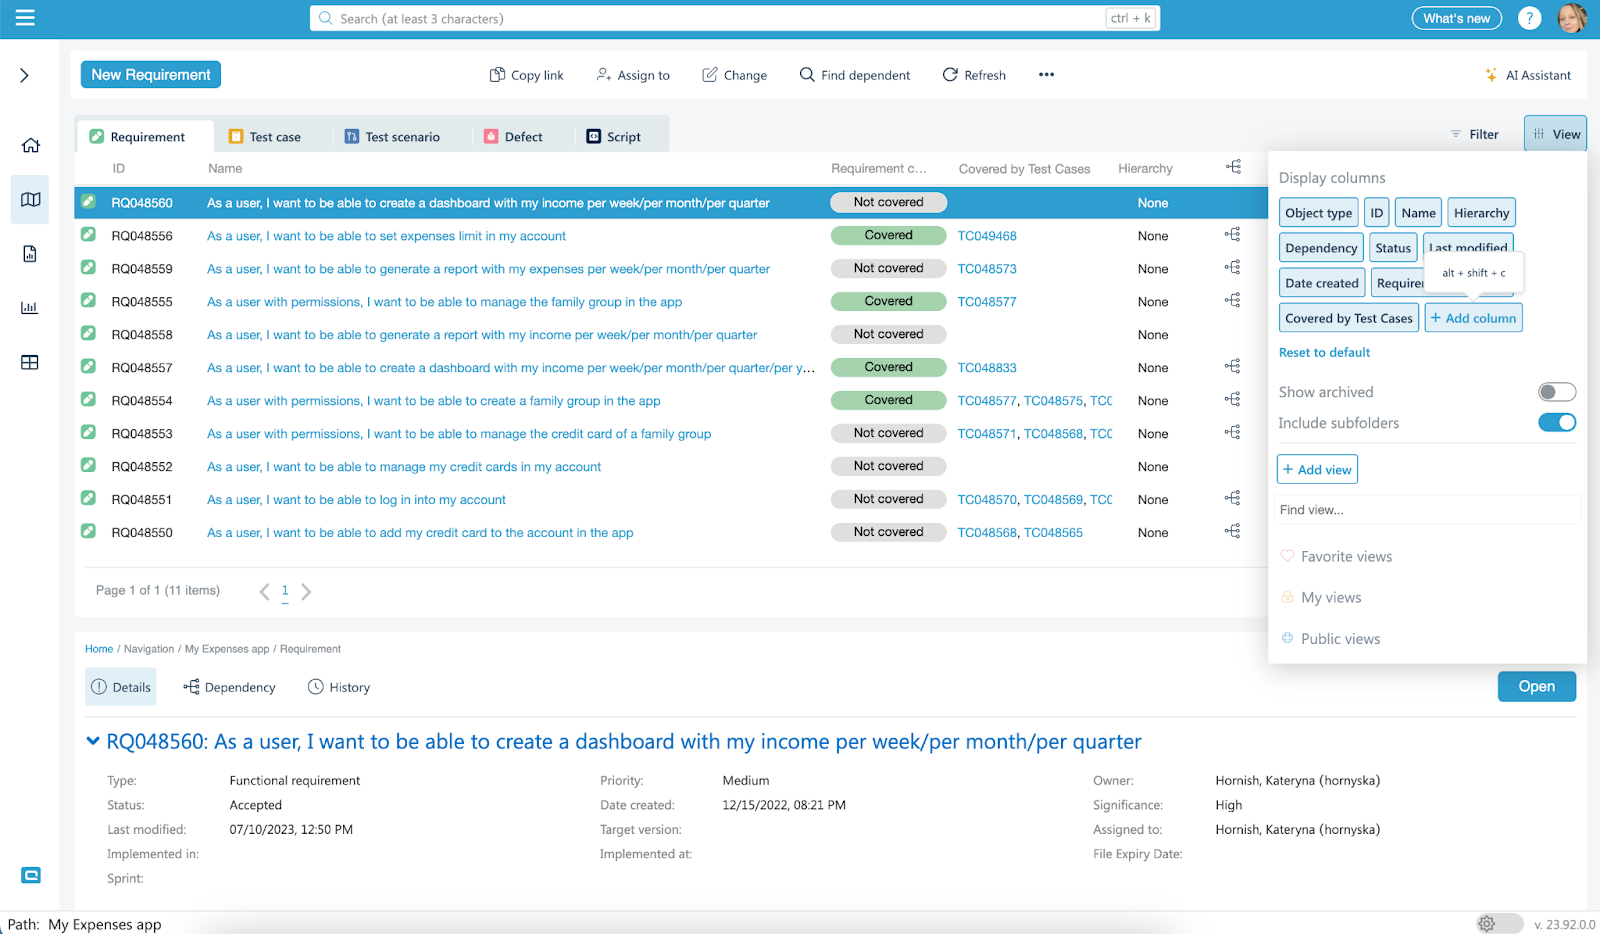
Alternatively, you can easily see the whole list of the columns by enabling the ‘View’ sidebar and then clicking the ‘Add column’ button. The same column chooser will appear, allowing you to select data you want to display.
In case you don’t have these feature guidelines at hand in the future, we got you covered. You can find all the information on the new features in our aqua wiki.
We continue to make aqua beneficial and easy to use. The upcoming releases will bring both new powerful features and user experience improvements, and we can’t wait to share them with you.
In the meantime, let us know if you have any questions or share feedback at support@aqua-cloud or feedback@aqua-cloud.io
Related Articles
Feature guidelines 24.8 - On Premise
Guidelines Version 24.8 Date: 16.02.2024 aqua4Jira Plugin - Now Compatible with Jira Data Center! Useful when: You are migrating from Jira Server to Jira Data Center You already using Jira Data Center but couldn’t connect aqua4Jira Guide: If you are ...Feature Guidelines 22.132.0 - On Premise
Guidelines Version 22.132.0 Date: 30.01.2023 Feature: Disable internal aqua authentication when SAML, LDAP or oAuth is set up Useful when: You have custom security rules in your external authentication system and want to prevent a user from bypassing ...Feature Guidelines 23.22.0 - On Premise
Guidelines Version 23.22 Date: 23.03.2023 Improvement: Preserving the high resolution and clarity of images when saving a ticket Useful when: You add a lot of images to the tickets You change the size of the images quite often Guide: The upcoming ...Feature Guidelines 22.123.0 - On Premise
Guidelines Version 22.123.0 Date: 20.12.2022 Feature: Requirement traceability: Show test cases and test scenarios that cover the requirements Useful when: You want to keep everything in one system instead of creating excel files or managing your ...Feature Guidelines 23.126.0 - On Premise
Guidelines Version 23.126 Date: 18.10.2023 Empower Your Testing: Customized execution fields for tailored test case runs Useful when: You want to be flexible when it comes to running in agile environments where test cases may need to accommodate ...