Feature guidelines 23.107.0 - SaaS

Guidelines
Version 23.107
Date: 12.09.2023
AI Copilot: Create different types of documents - Feature That Will Knock Your Socks Off
Useful when:
You want to streamline the process of creating requirements, user stories or BDDs
You want to follow best practices when it comes to document creation, ensuring that the added tickets are of high quality (grammar, vocabulary) and consistent.
You need to ensure that all aspects of the documents are covered.
Looking for the flexibility to choose between narration and manual input, so you can work in the way that suits you best.
With AI Copilot, creating various types of documentation is a breeze, whether you're an experienced pro or just starting out.
To get started with AI Copilot, make sure you have AI features enabled for your account. If you haven't already, request access to the beta version by reaching out to us at support@aqua-cloud.io, and we'll enable it for you right away.
Here's a step-by-step guide on how to use AI Copilot.
First, choose or create the requirement you want to work on.
Next, click the 'Write' button on the ribbon.

When the modal pops up, you have two options:
Click the microphone icon and narrate your ideas to AI Copilot to analyze and convert into text. You can modify it further if needed.
Alternatively, you can paste information or manually enter notes in the corresponding text box.
Give AI as many details as you like, but remember you're providing hints, not writing the entire document. Let AI Copilot do its magic.

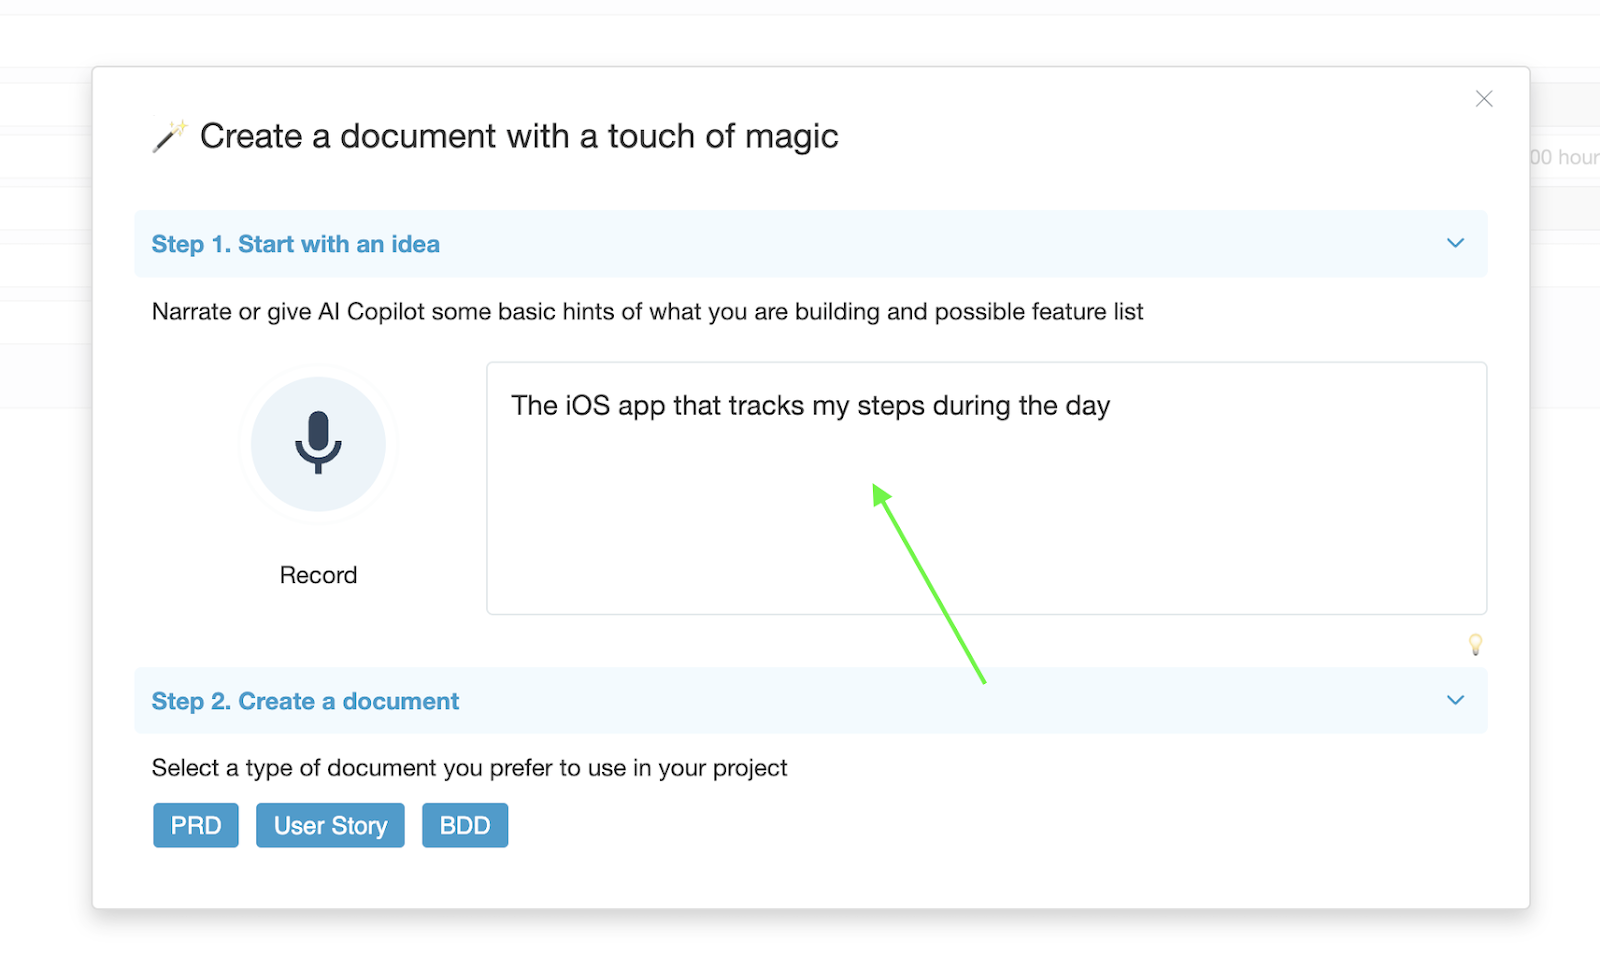
Once you've provided some details, choose the type of document you want to create and wait a few seconds.
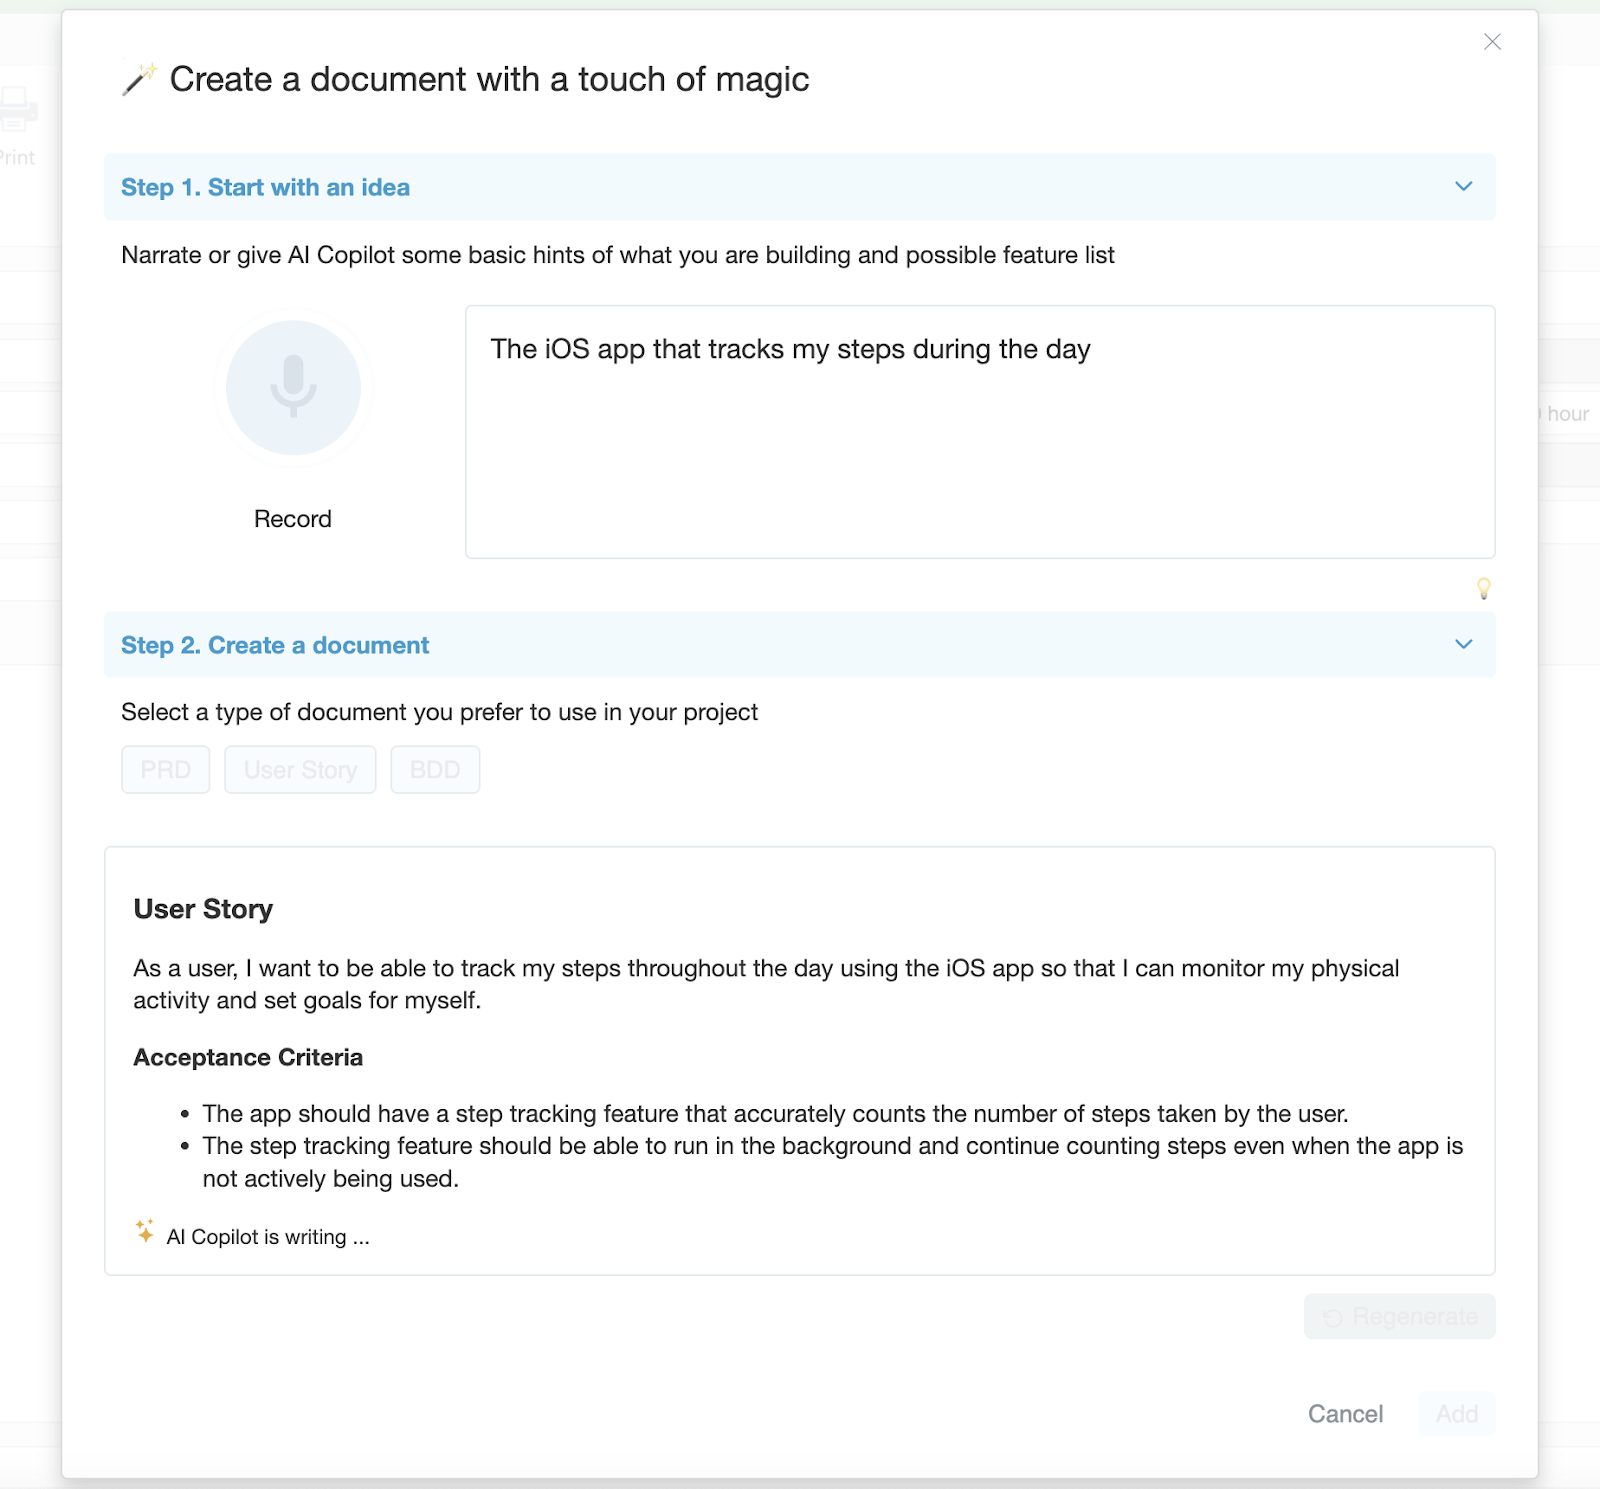
If the initial document isn't quite what you're looking for, no worries. You can regenerate it as many times as needed until you're satisfied. You can also make adjustments to the output.
In case you want a slightly different document, you can easily tweak the context and generate it again.
Feel free to switch between different types of documentation on the fly.
Once you happy with the document, click the button ‘Add’ to finish creating the ticket.
AI Copilot is here to make your documentation tasks a whole lot easier, so have fun creating and editing your documents effortlessly!
New Integrations Page Look and Feel – Your Integration Superpower!
Useful when:
You want to have an overview which project has an integration
You want to see if there is a connection to Jira to make sure that integration is successful
You are looking forward to new integrations and want to provide some feedback
Guide:
Open the 'Integrations' page, and you'll land on the 'Global' tab. Here, you can set up a single integration that applies to all the projects you have in aqua.


Choose the integration, such as Jira, and then click the 'Configure' button.
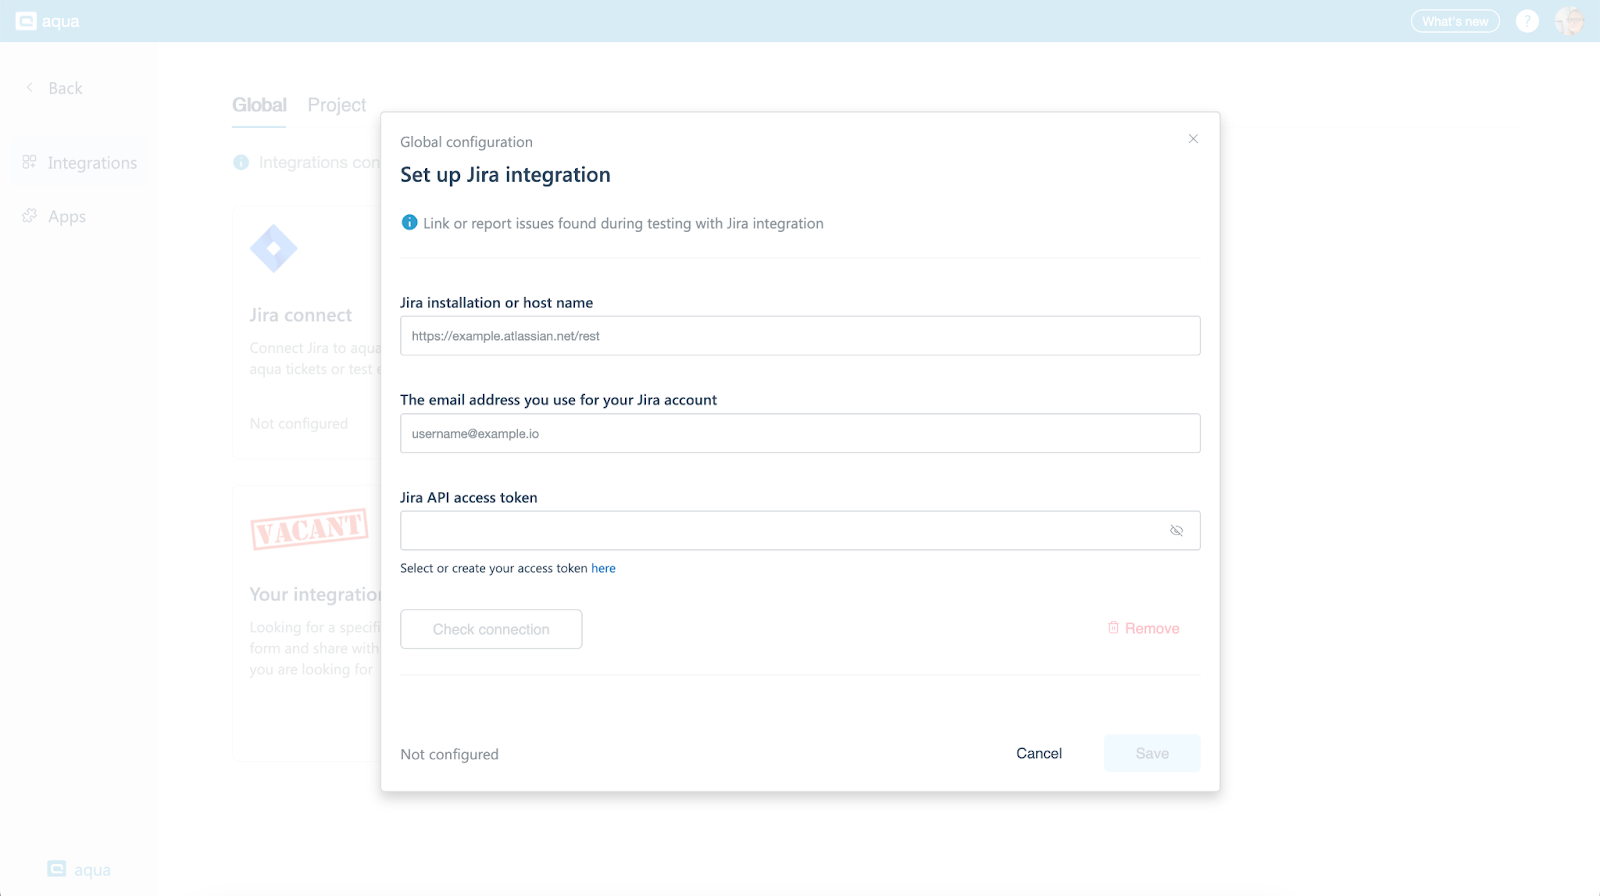
Enter all the necessary details and click 'Check connection.' If all your credentials are correct, you'll see the following message:

If your credentials are incorrect, you'll encounter the following message:

To finish the integration set up, don’t forget to click the ‘Save’ button.
You can also set up the integration on a project level, either from the main Integrations page or within the project settings.
Once you've created an integration on a project level, you'll find a tile under the project tab that displays the added integration and which project it's associated with.

It's important to note that project-level configuration takes precedence over the global configuration.
Additionally, moving forward, if your project is put on hold or you need to make adjustments, there's no need to remove the integration entirely. You can simply disable it and re-enable it as needed.
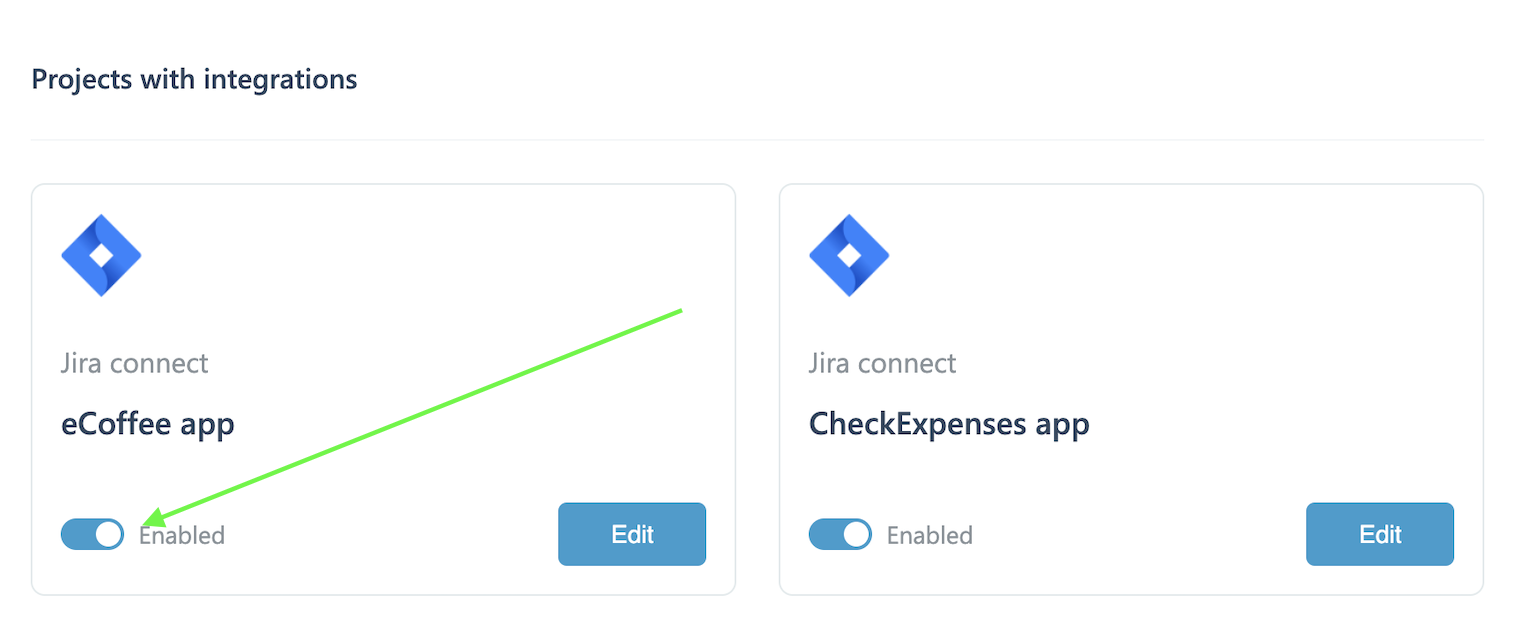
This means that users won't have the ability to preview or link issues or tickets to aqua projects while it’s disabled, but everything becomes available again as soon as the integration is re-enabled.
We also added the page with aqua apps that you can download and utilise for free. Learn more here about Capture and here about the Jira plugin if you haven’t used it yet.

Got a wish-list of integrations you'd love to see? We're all ears! Access the survey from the ‘Integrations’ page and tell us what you're dreaming of.

New Look and Feel for Chart Creation: A Dash of Wow!
Benefits:
Streamlined Chart Creation: Easier to select and change the chart types
Customization Power: With the revamped chart creation, you gain more control over the appearance and behavior of your charts.
Guide:
Open the dashboard and click on the 'New Chart' button.

Once the modal window appears, choose the type of chart you'd like to use.

Next, select the project or specific folder containing the data you want to use for your chart and the item type.
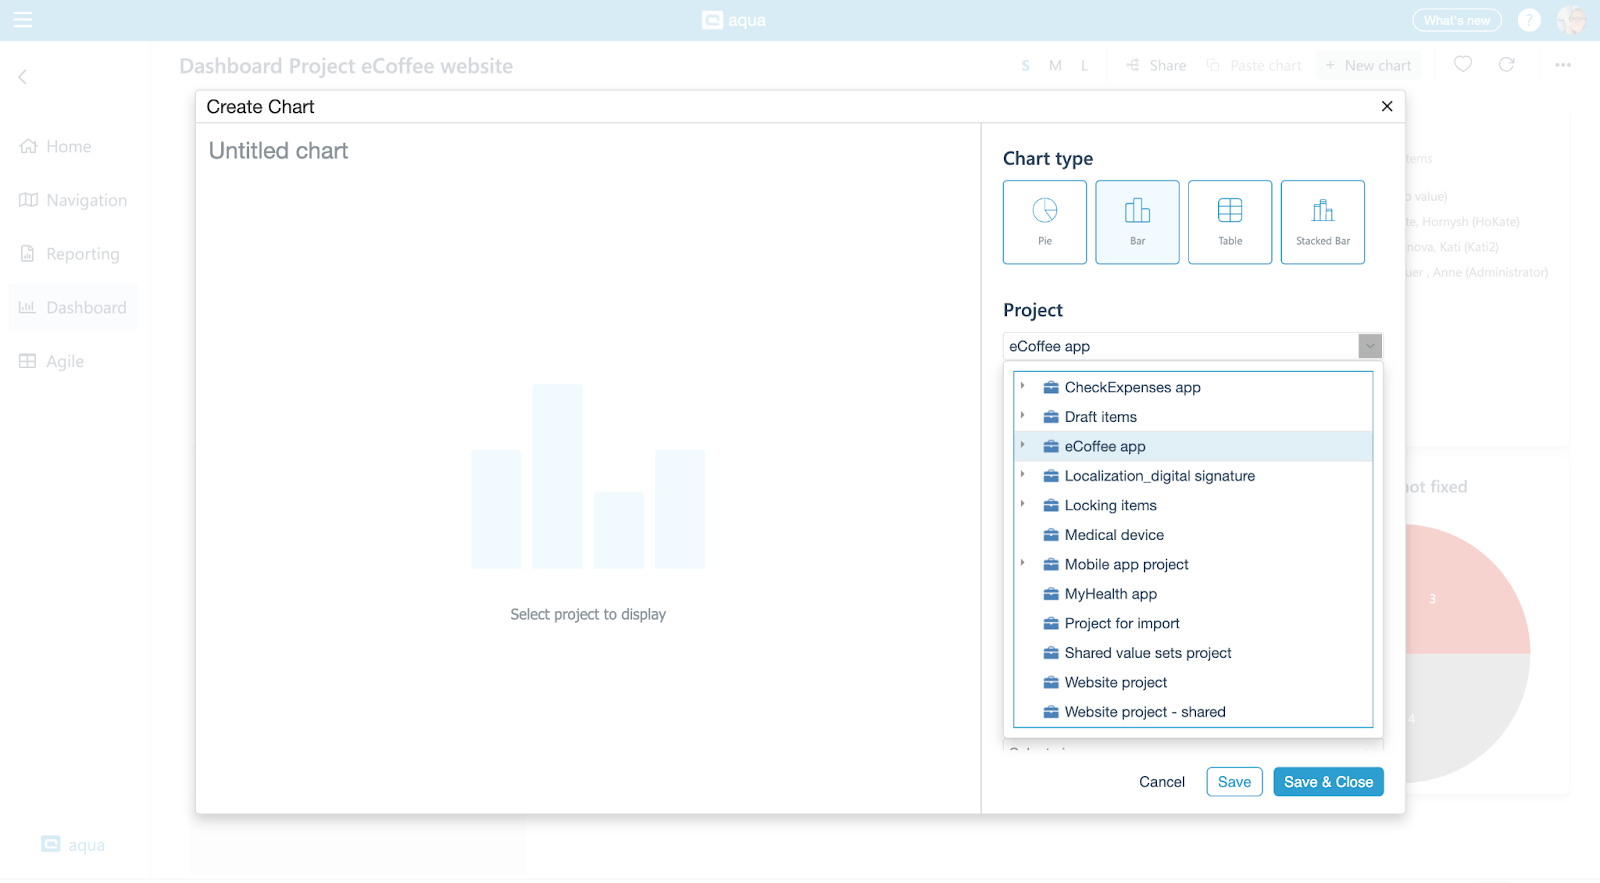
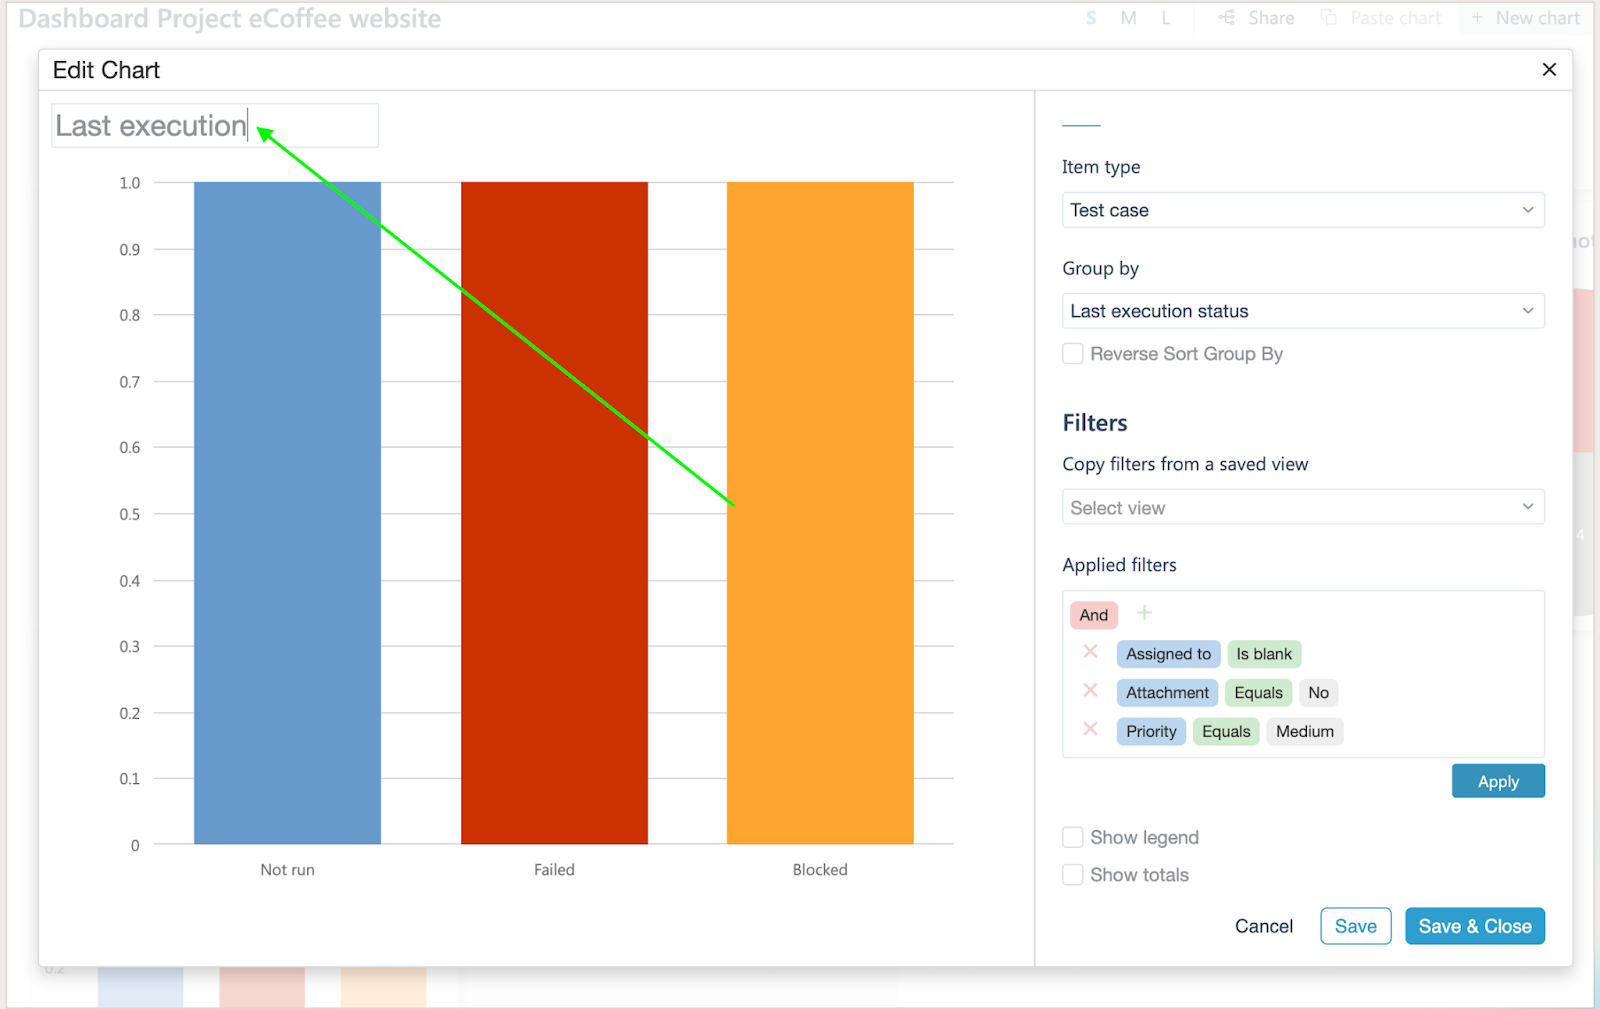
Make any necessary adjustments by applying filters and selecting additional details you want to display. Finally, click the 'Save' button to preview your chart.
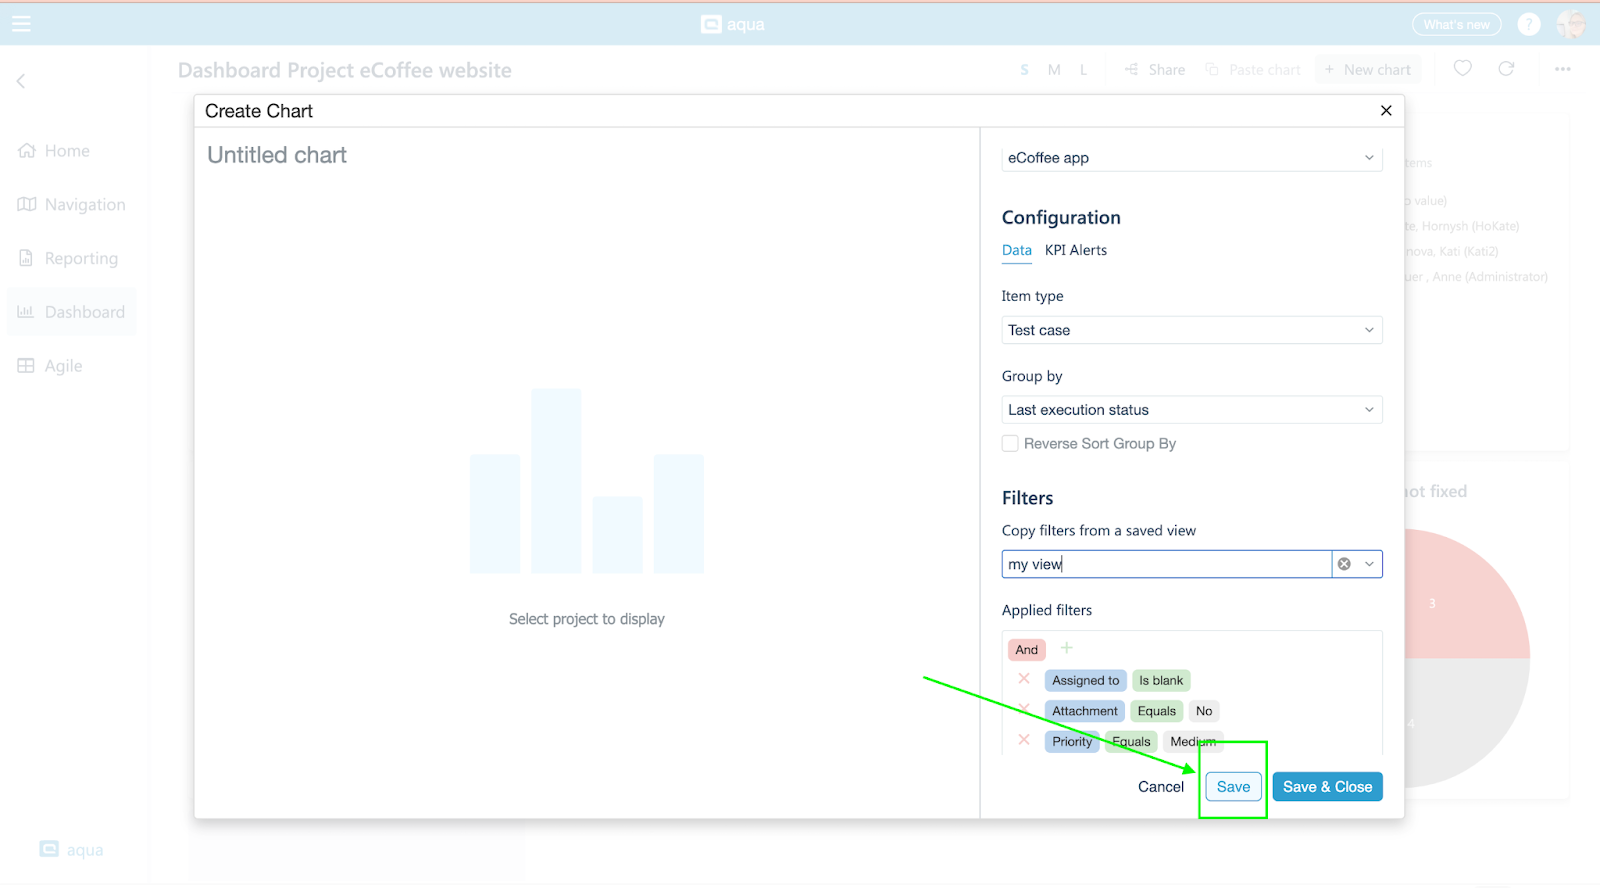
If you're satisfied with how the data is presented, simply click 'Save & Close.'

If you wish to make adjustments or change the chart type, no worries; make the necessary changes and click the 'Save' button again.
Don't forget to provide a title for your chart so you can easily understand the data it presents.
Small UX Tweak: Project and Item Creation Made a Breeze
Benefits:
More intuitive and user-friendly approach that reduces the learning curve for new users and minimizes the steps required to manage projects and their associated items.
Option to create it from a tree view enhances the overall user experience and reduces the potential for errors.
Guide:
Creating a project becomes even easier.
Just click the 'Plus' icon next to the 'Project' label.

We haven't removed this option from the dropdown, so you can use either method based on what's more convenient for you.
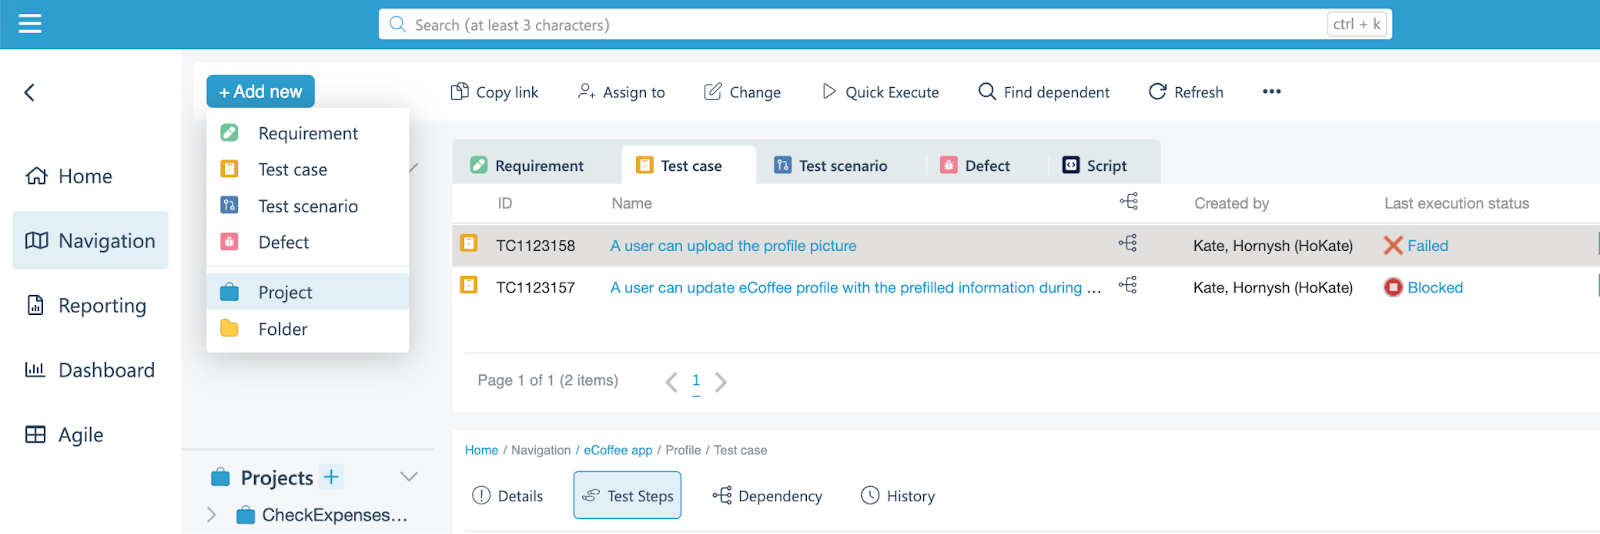
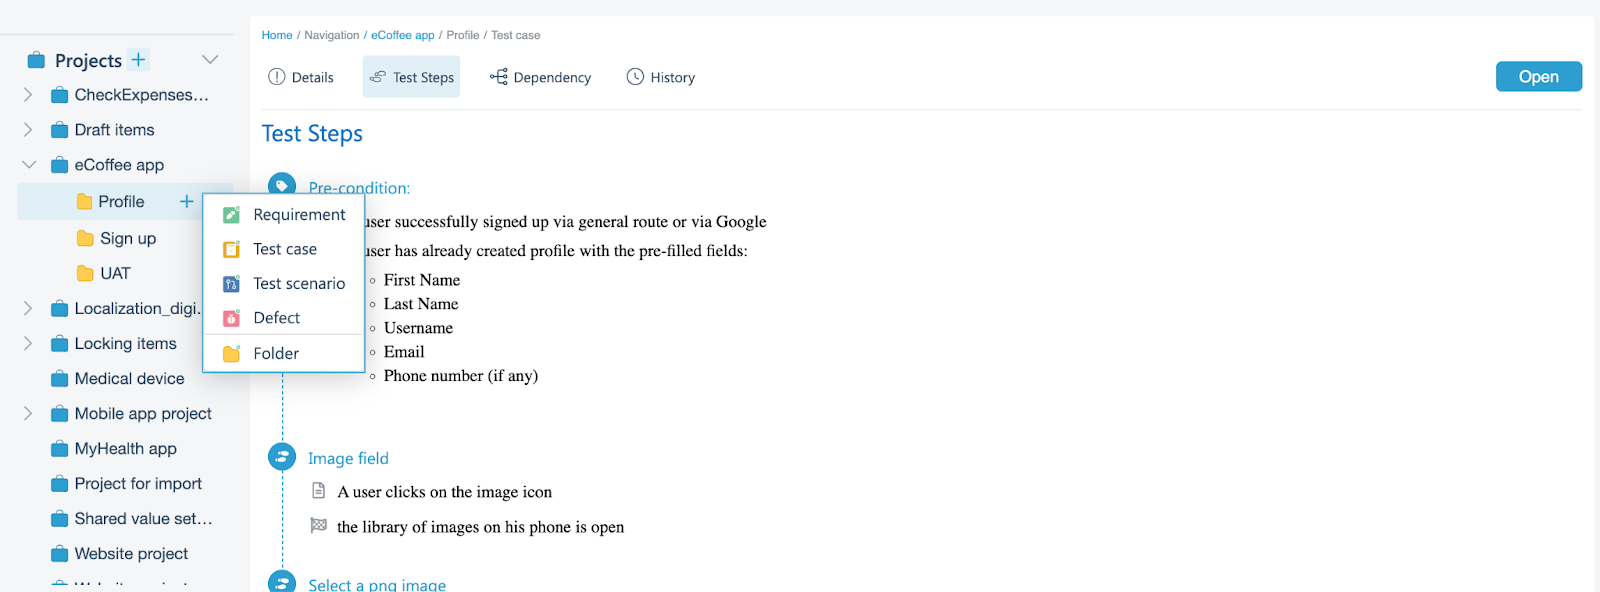
To create an item or folder within a specific project, first select the project, and the plus icon will appear. Click on it, and choose the option you need.
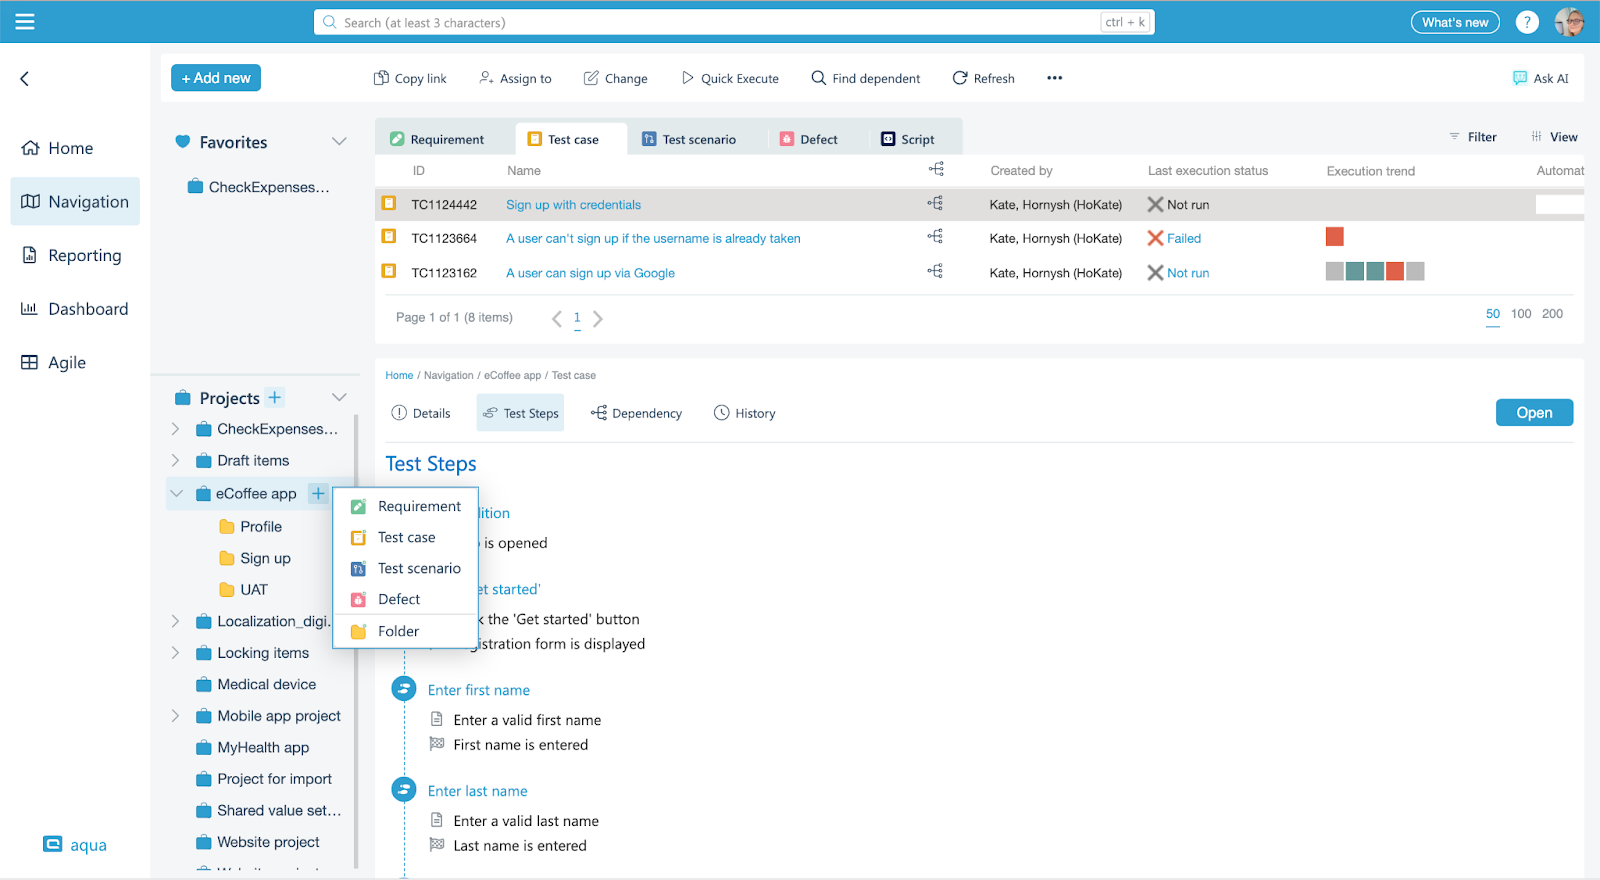
If you want to create an item within a folder or subfolder, select the folder and click on the 'Plus' icon that appears. Then, perform the same actions as described above.

We continue to make aqua beneficial and easy to use. The upcoming releases will bring both new powerful features and user experience improvements, and we can’t wait to share them with you.
In the meantime, let us know if you have any questions or share feedback at support@aqua-cloud or feedback@aqua-cloud.io
Related Articles
Feature Guidelines 23.92 - SaaS
Guidelines Version 23.92 Date: 23.08.2023 aqua AI Copilot: Turbocharged Text Editing Useful when: You want to reduce the time and effort spent on refining the text You need to maintain a consistent tone and language across your documentation You have ...Feature Guidelines 23.22.0 - SaaS
Guidelines Version 23.22 Date: 23.03.2023 Improvement: Preserving the high resolution and clarity of images when saving a ticket Useful when: You add a lot of images to the tickets You change the size of the images quite often Guide: The upcoming ...Feature Guidelines 22.132.0 - SaaS
Guidelines Version 22.132.0 Date: 30.01.2023 Feature: Disable internal aqua authentication when SAML, LDAP or oAuth is set up Useful when: You have custom security rules in your external authentication system and want to prevent a user from bypassing ...Feature Guidelines 22.123.0 - SaaS
Guidelines Version 22.123.0 Date: 20.12.2022 Feature: Quick preview of items on backlog page and scrum board Useful when: You need to quickly check the content of the item You want to swiftly look through ticket details to understand whether this it ...Feature Guidelines 23.126.0 - SaaS
Guidelines Version 23.126 Date: 18.10.2023 Empower Your Testing: Customized execution fields for tailored test case runs Useful when: You want to be flexible when it comes to running in agile environments where test cases may need to accommodate ...